
Chapter 4: Volume Flow Scalping Solution – 3 setups, 1 checklist
The 3 setups below translate the principles from Chapter 3 into concrete observation processes. Treat them as checklist templates for backtesting and sharpening your chart-reading – not as formulas that guarantee trading results.
4.1. Setup 1 – Strong reversal bar
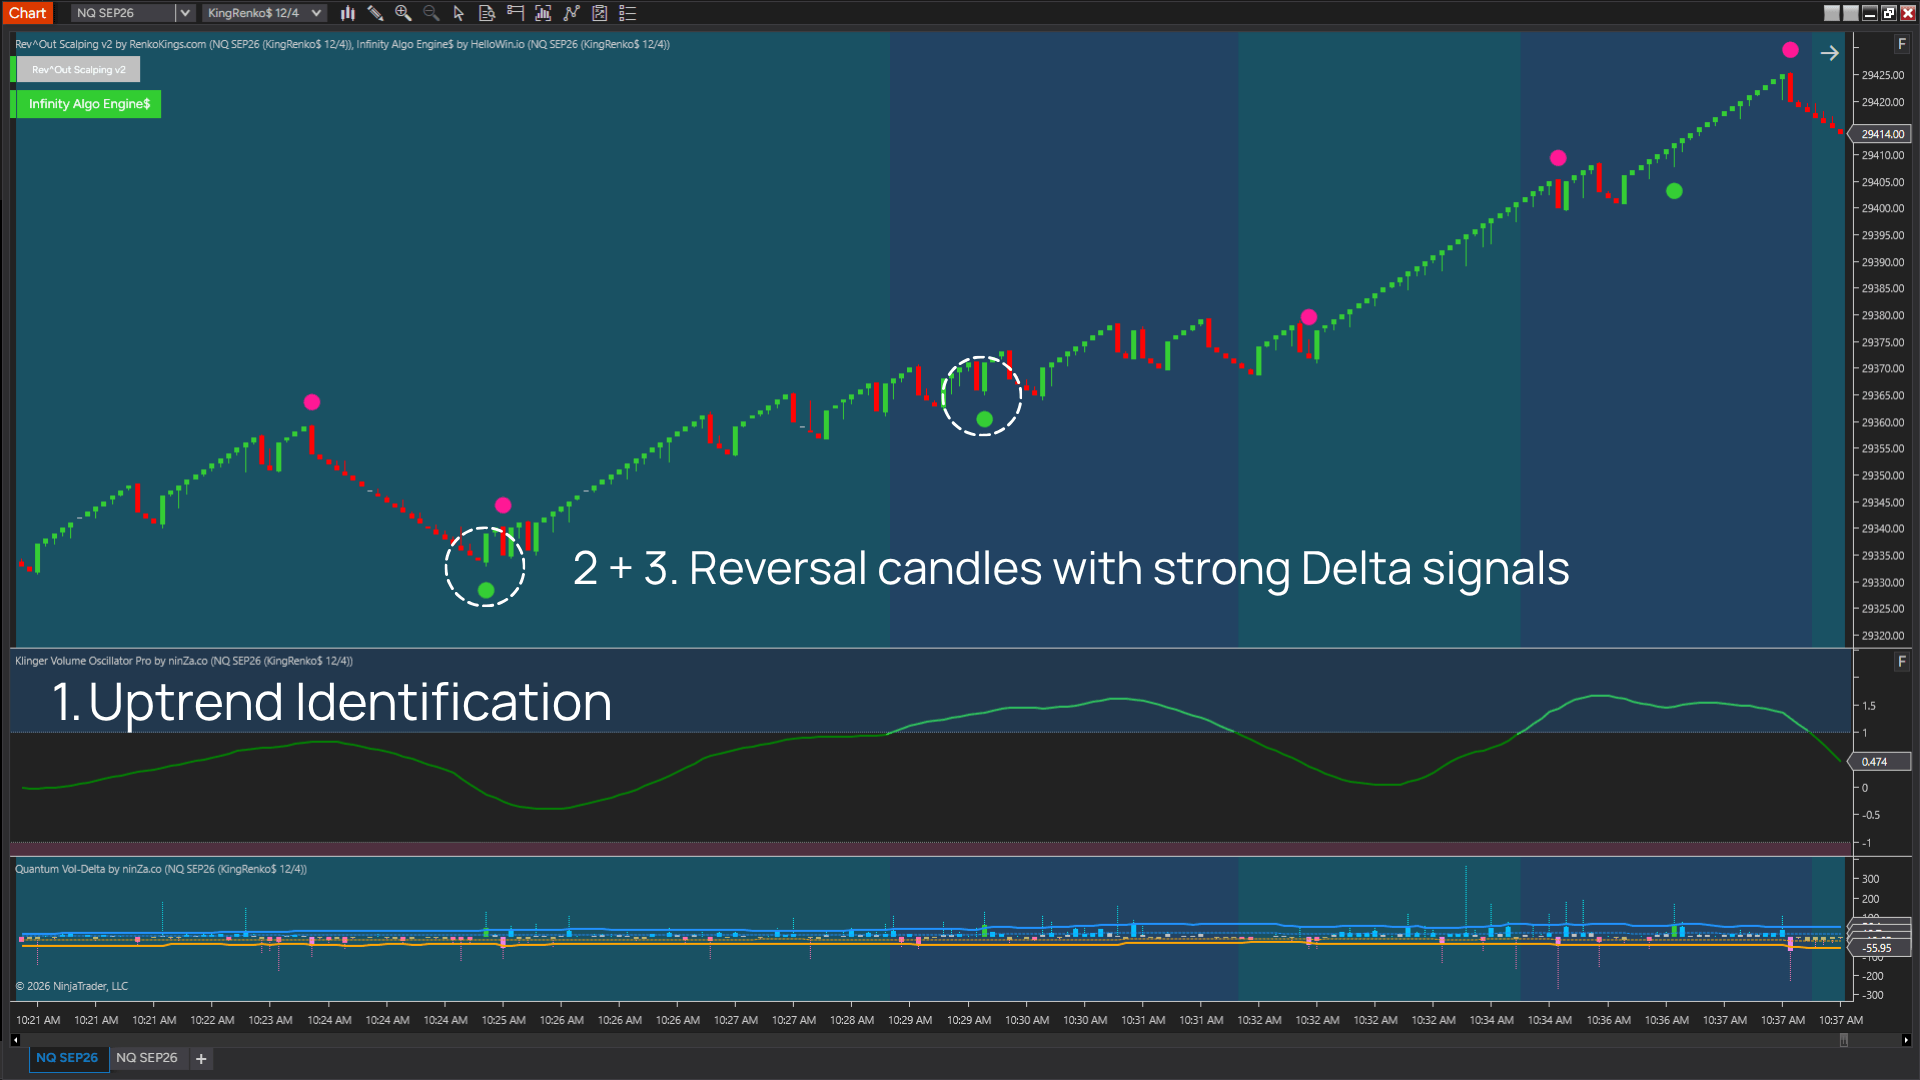
- Step 1: Identify the preferred direction using Klinger Volume Oscillator Pro.
- Step 2: Wait for a Reversal Bar that aligns with that direction.
- Step 3: Confirm strong Delta on that candle using Quantum Vol-Delta → Entry.
Why this setup?
A Reversal Bar is already a strong candle on its own, since it shows the market rejecting the prior direction and regaining control in the opposite direction. However, two Reversal Bars with a similar shape don’t necessarily carry the same quality.
Adding Delta helps separate a reversal that only looks good on price action from one that is genuinely backed by strong buying or selling participation. When trend direction, Reversal Bar structure, and Delta all align, the setup is no longer based on a single signal – it becomes a convergence of context, price action, and order flow.
4.2. Checklist 2 – Outside Bar + Delta
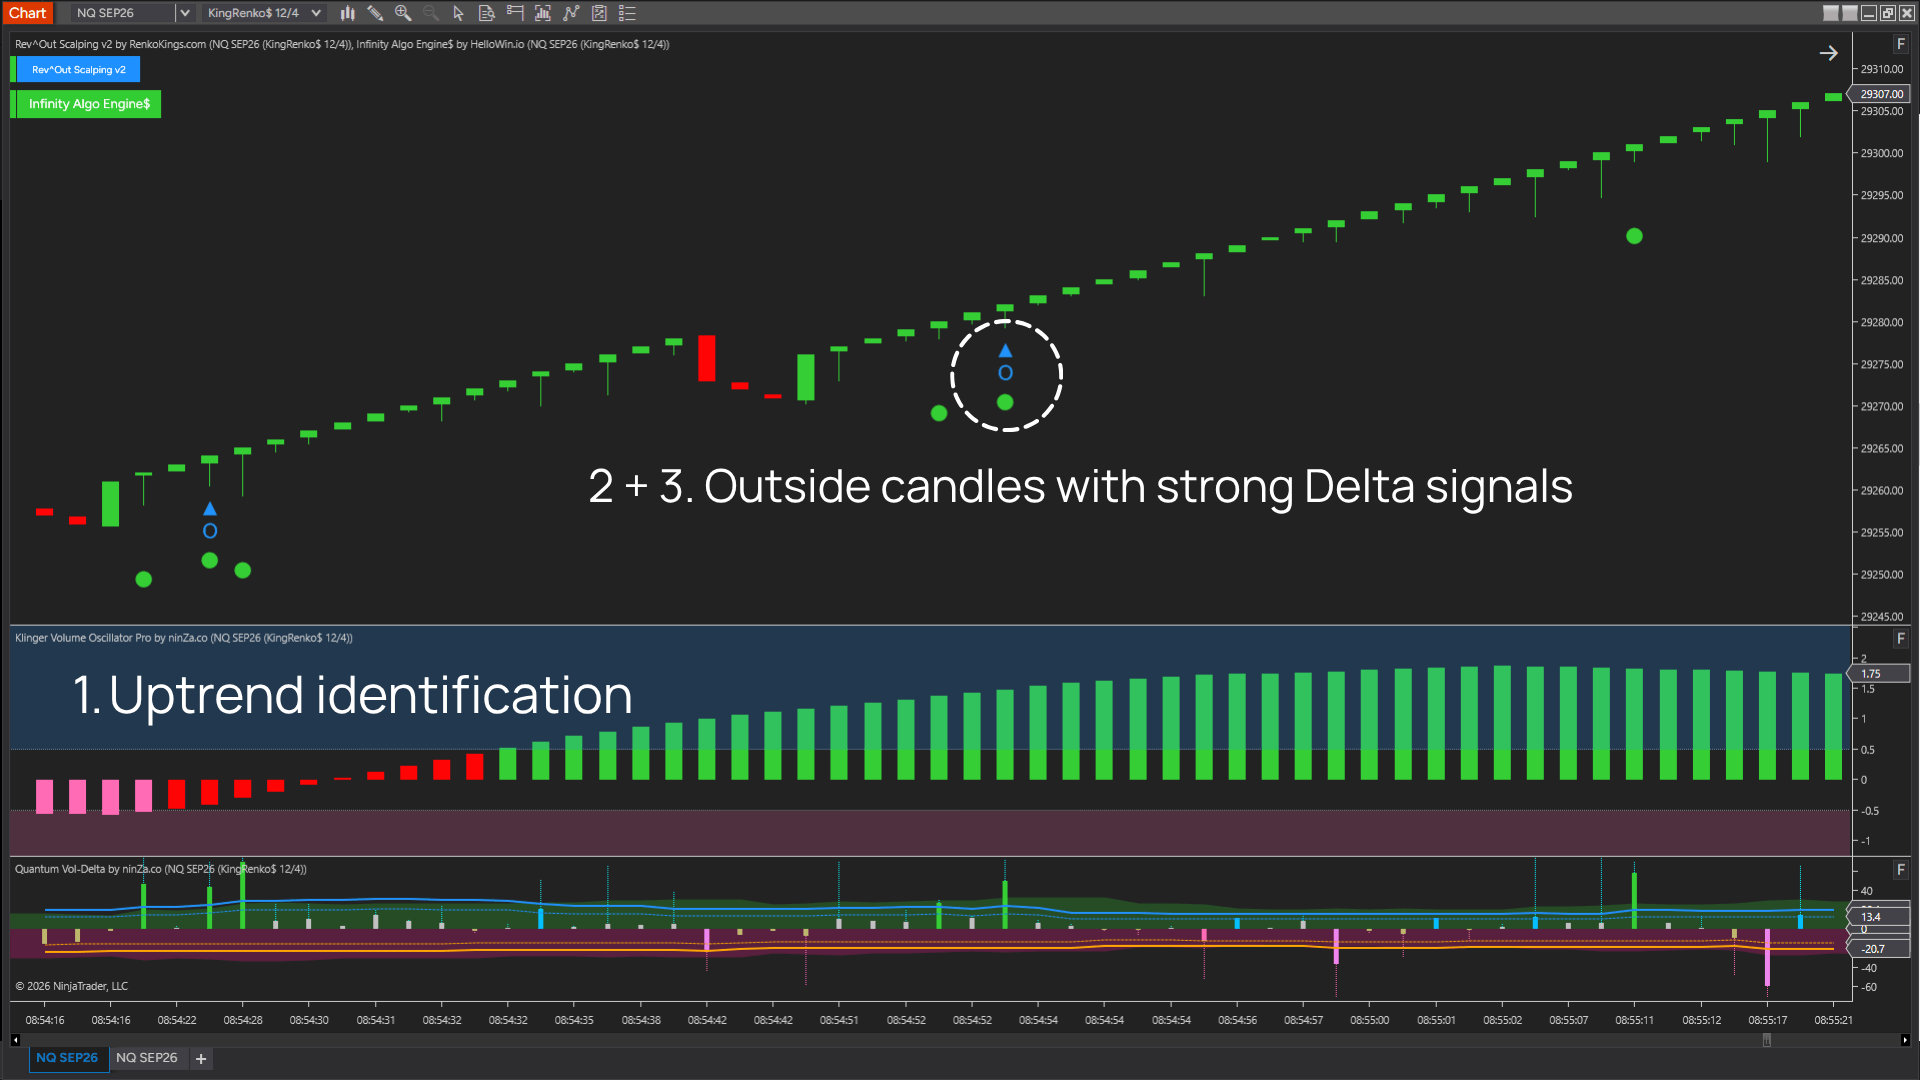
- Step 1: Identify the preferred direction using Klinger Volume Oscillator Pro.
- Step 2: Wait for an Outside Bar or a Vol signal from Rev^Out Scalping.
- Step 3: Confirm strong Delta at or around the signal zone → Entry.
Why this setup?
An Outside Bar is already a strong price action structure, since within a single candle, price can expand beyond the entire range of the previous candle — signaling a meaningful shift in buying or selling pressure.
But what matters isn’t just how large the Outside Bar is; it’s whether the pressure behind it is actually sustained. When strong Delta appears at or around the signal candle, the trader gets additional evidence that the price expansion is accompanied by active order flow in the same direction. Adding the trend filter from Klinger helps filter out Outside Bars that look strong but appear in the wrong context, keeping the focus on entries with clearer alignment between trend, price expansion, and volume flow.
4.3. Checklist 3 – Long-wick rejection
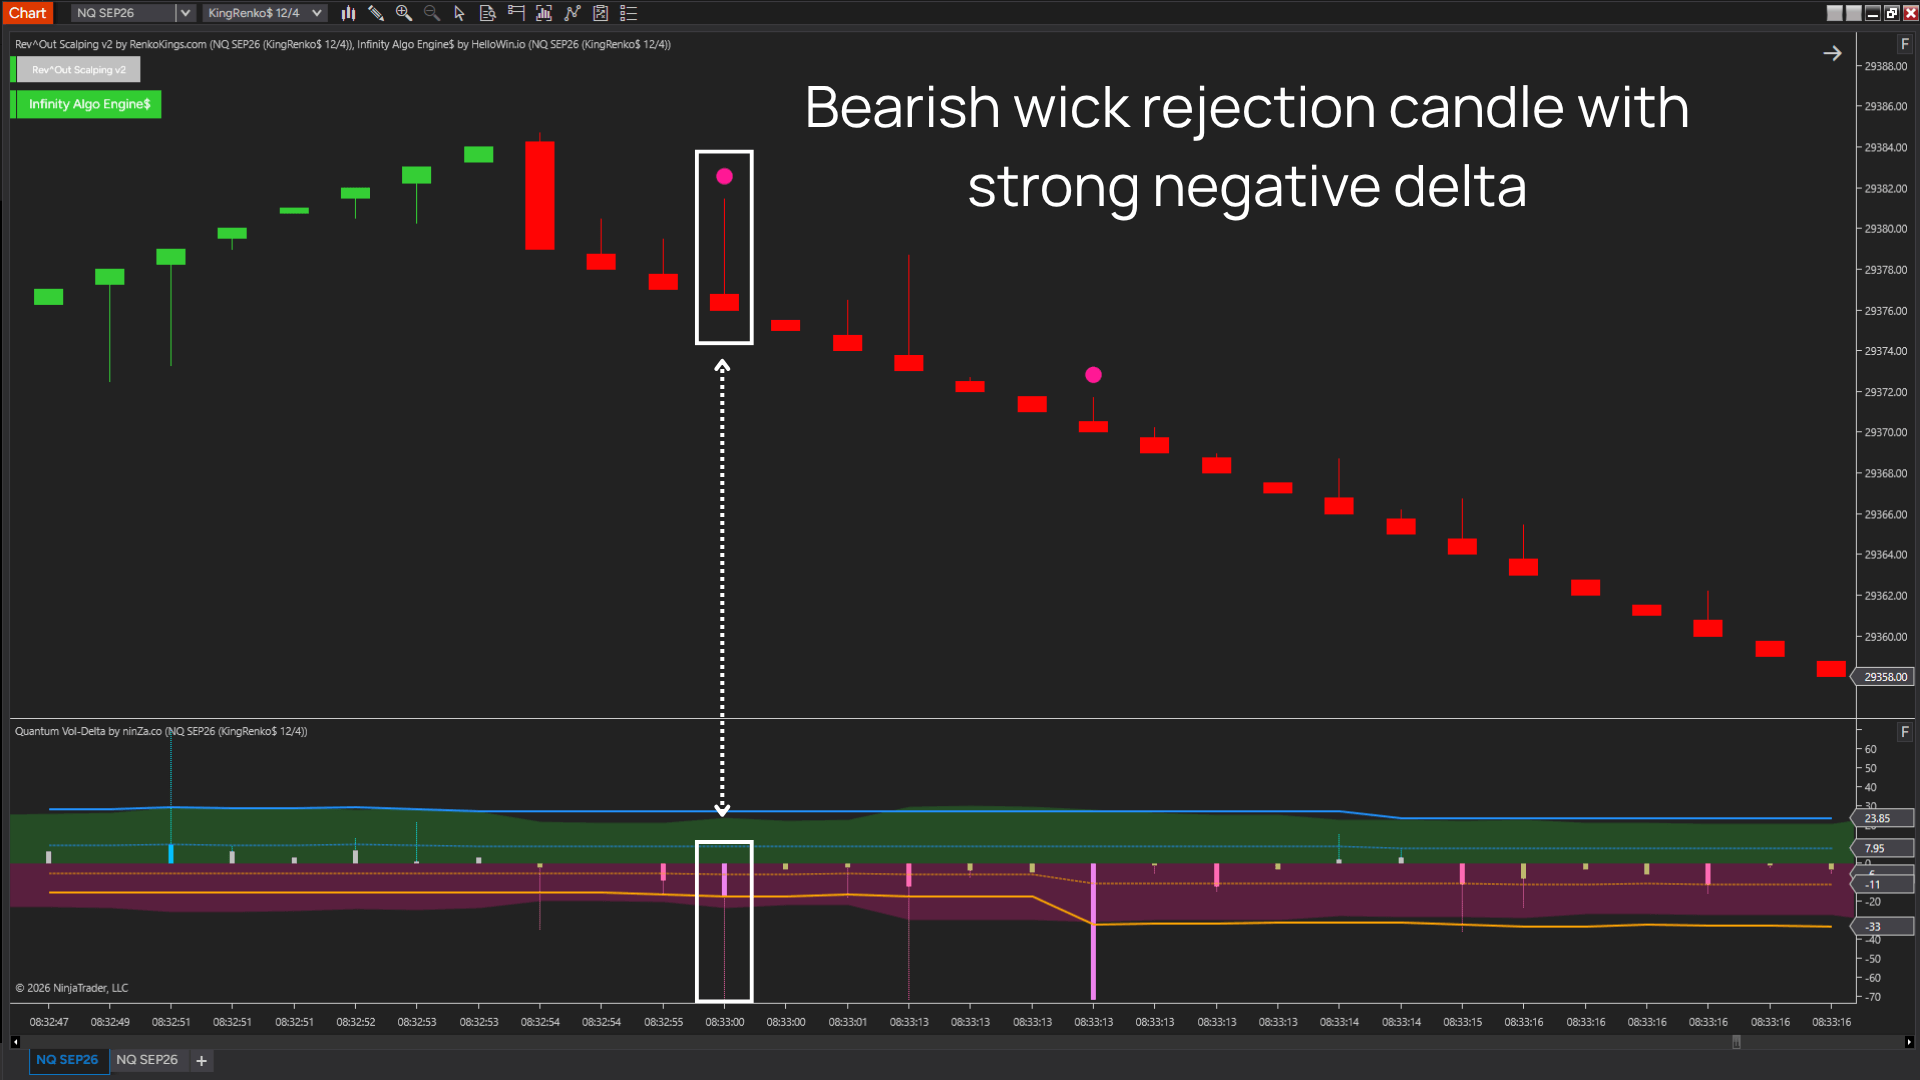
- Step 1: Wait for a candle with a long wick, showing a clear price rejection.
- Step 2: Identify the direction of the rejection and the candle’s closing direction.
- Step 3: Confirm strong Delta in the same direction as the candle body → Entry.
Why this setup?
A candle with a long wick is a strong signal because price was pushed deep in one direction but couldn’t hold there, then got pulled back before the candle closed. This shows that at the rejected price zone, opposing force was strong enough to stop the move from continuing.
However, a long wick alone doesn’t tell you whether that rejection was backed by strong order flow or was just a short-term reaction under thin liquidity. When Delta confirms in the same direction as the candle body, the trader gets additional evidence that the rejection isn’t just a shape on the chart, but comes with a clear shift in buying/selling pressure.
This is also why this setup can be used more flexibly with Klinger: the focus isn’t on the longer-term trend, but on price failing at a specific level and reacting strongly right at that point.
4.4. How the 3 layers complement each other
The 3 layers in the checklist describe three different aspects: Klinger Volume Oscillator Pro provides volume context; Rev^Out Scalping and KingRenko$ help identify candle structure; Quantum Vol-Delta shows the imbalance between active buying and selling at the entry zone. Separating these roles helps the trader know exactly what they’re checking at each step.
Volume is related to activity and price movement, but large volume shouldn’t be equated with “big money” or with price being certain to continue. In this checklist, Klinger Volume Oscillator Pro and Delta are used to observe whether volume activity aligns with the direction and structure of price seen on the chart.
When price action and Delta both point to compatible information, the trader gains an additional layer of data to evaluate the setup. However, confluence doesn’t automatically make these conditions statistically independent, nor does it guarantee a higher win rate. The value of this combination needs to be measured through backtesting and forward testing on real data.
4.5. The general formula
Context + Candle + Overlap Volume
- Context (Klinger Volume Oscillator Pro) answers the question “which direction should I lean toward?”
- Candle (Rev^Out Scalping, standardized through KingRenko$) answers the question “at which specific point?”
- Overlap Volume (Quantum Vol-Delta) answers the question “is that point genuinely backed by active order flow?”
These three layers answer three independent questions; missing any one of them, the checklist falls back into one of the entry errors already noted in Chapter 2 — having direction but no clear entry point, having an entry point but no clear direction, or having both but without genuine order flow support.
Continue reading → Chapter 5: From entry to exit – Managing risk