
Chapter 5: Reading real charts: Clean signals and when to skip
On a completed chart, reversal points often look obvious. In real time, however, you can see only the bricks that have formed so far. Read the charts below in sequence: first the price move and Superior Keltner, then the reversal signal, followed by Momentum Pro and Superior RSI. This approach helps you recognize a setup as it develops instead of selecting a perfect-looking entry after the outcome is known.
5.1. Overview of the example chart
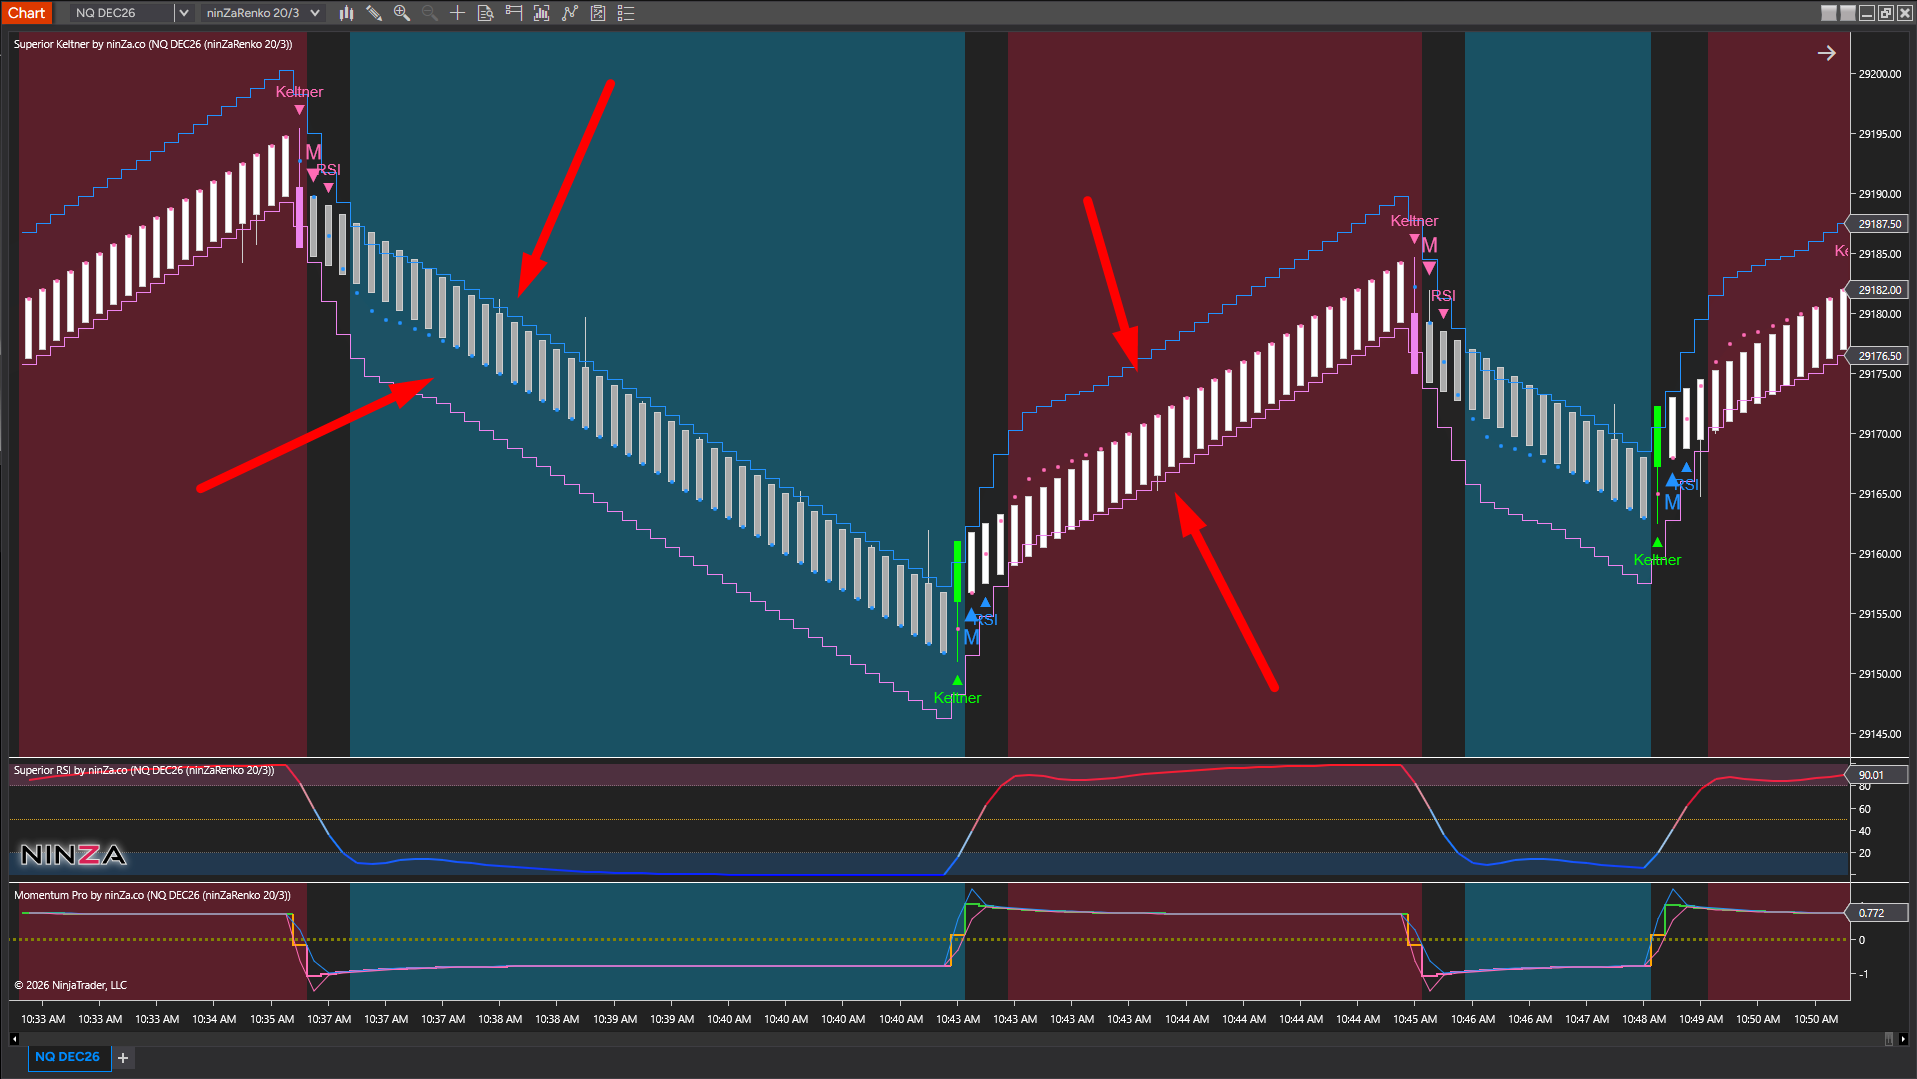
During an advance, the Keltner Upper Band slopes upward while the Lower Band tracks the bullish bricks. During a decline, the pattern is reversed. The Keltner label marks the first signal, M indicates confirmation from Momentum Plot, and RSI marks the final step. The red arrows highlight the band slope and the position of the opposite band. Look at the price move leading into each signal, not just the entry point.
5.2. Sell example – When an advance begins to reverse
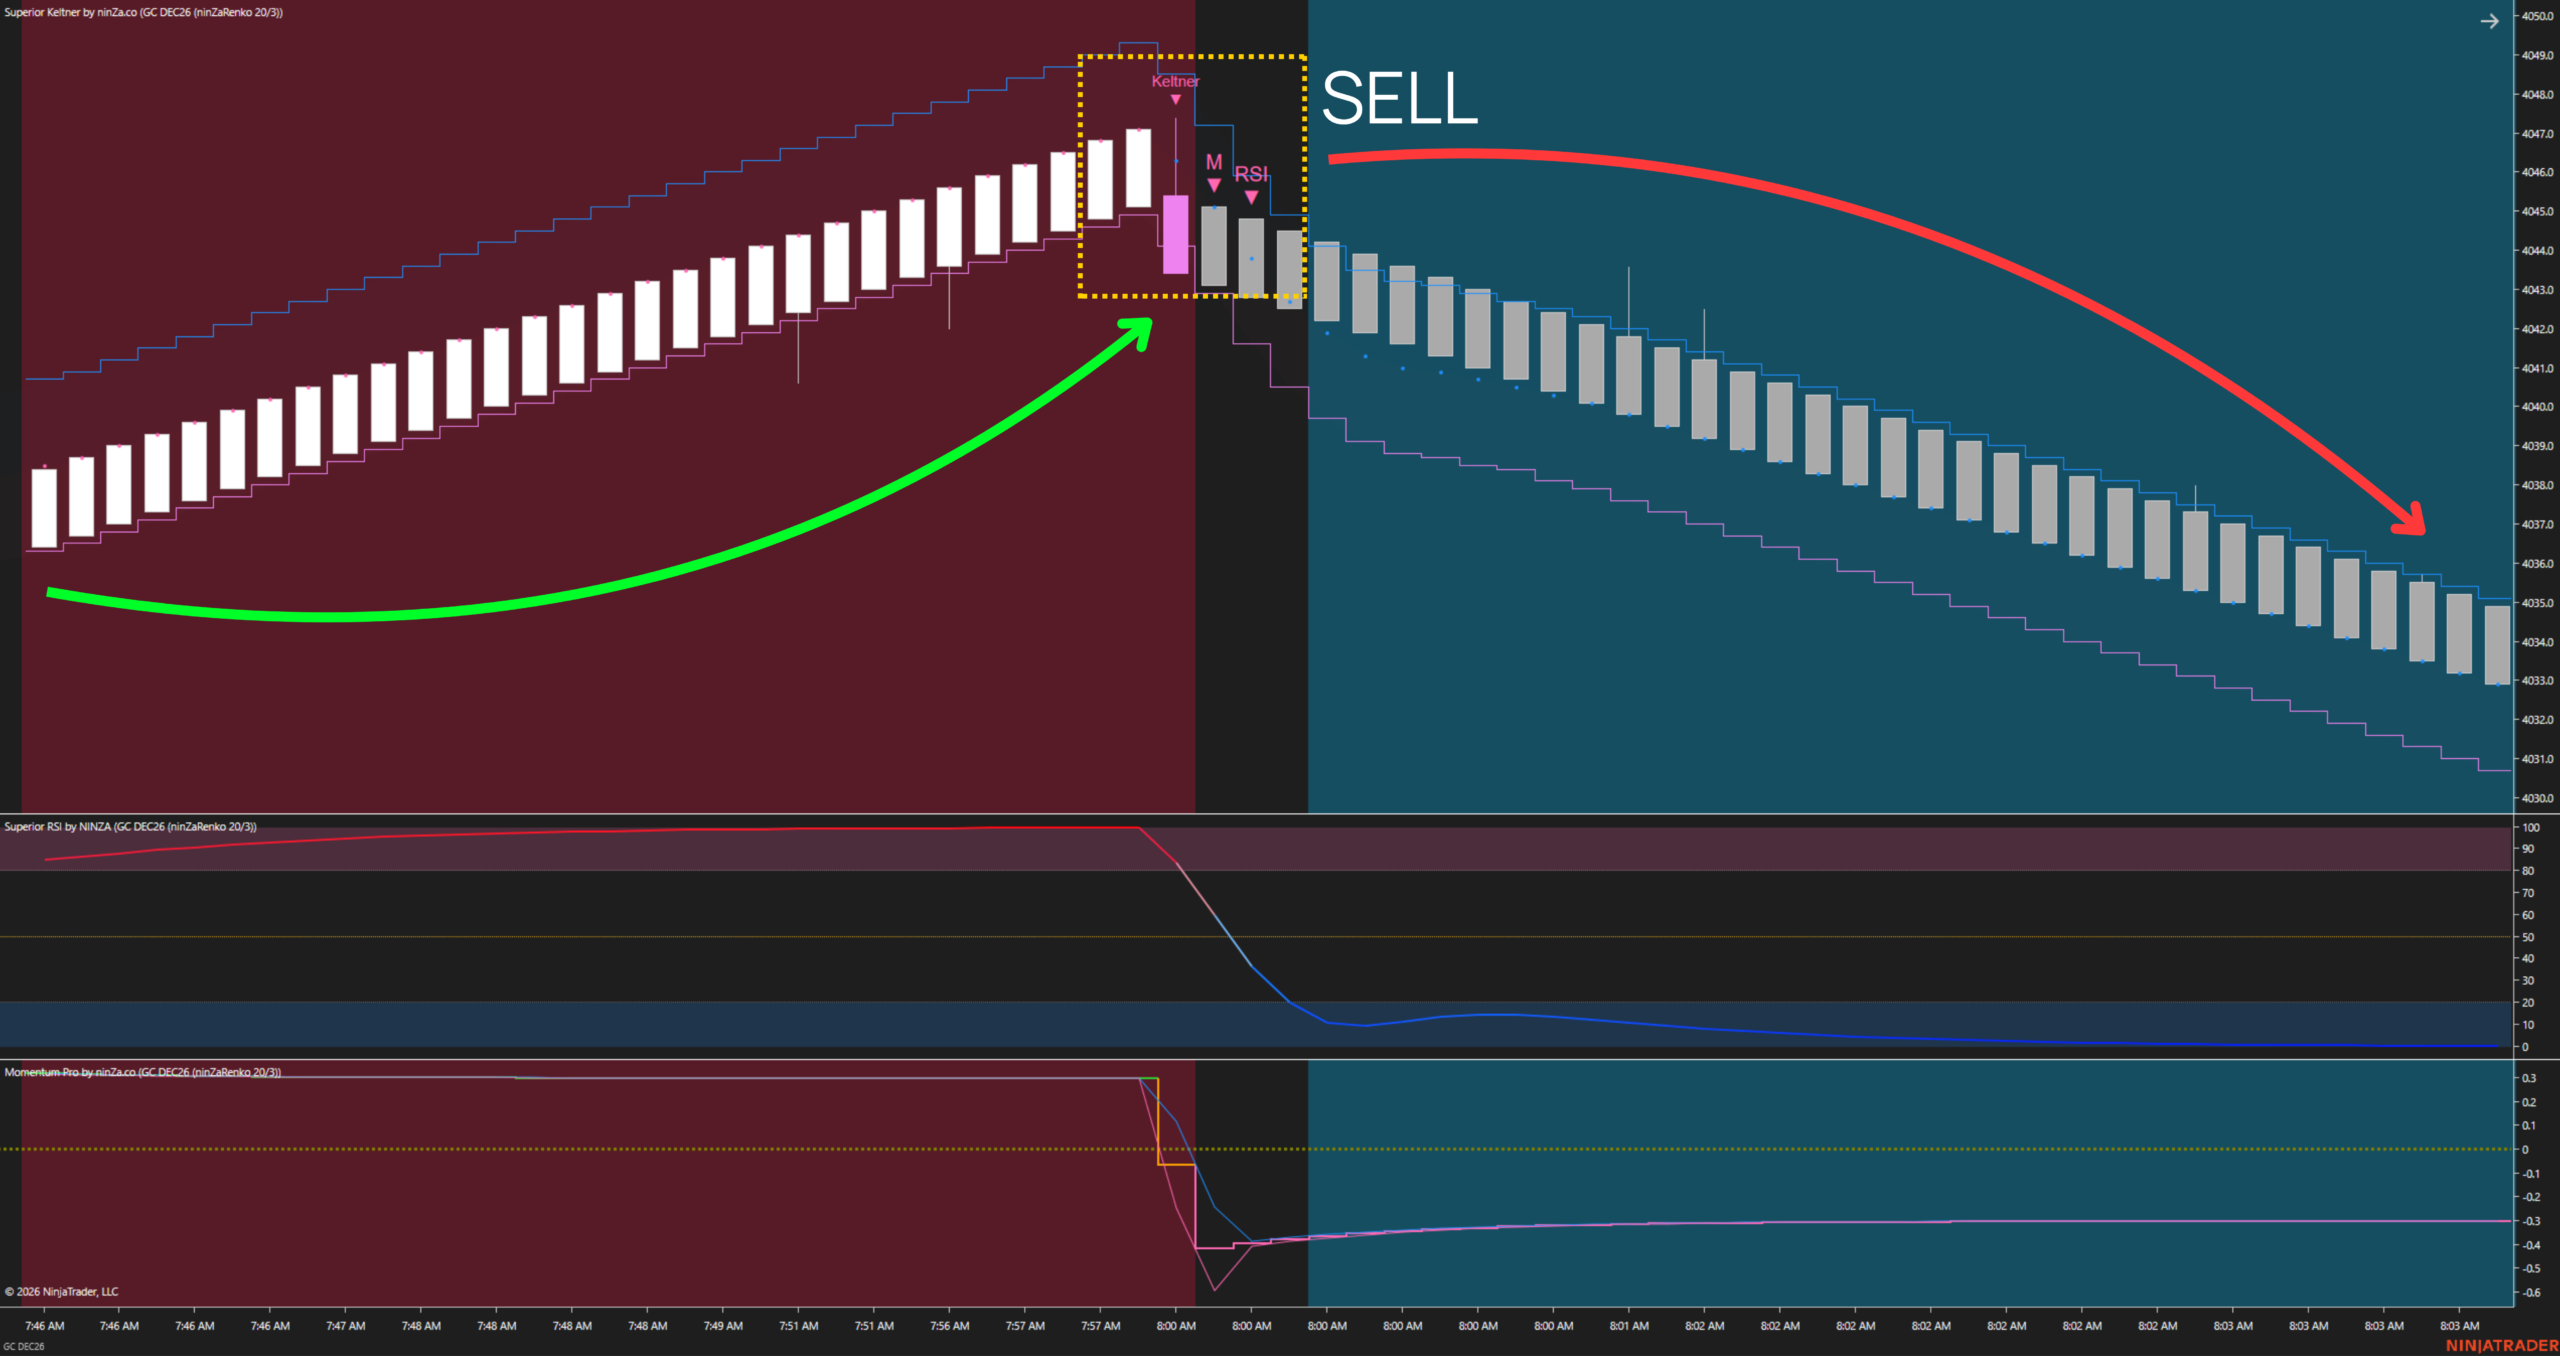
Before the Sell setup formed, the market had printed a fairly long series of bullish Renko bricks. The Keltner Upper Band was sloping upward, the Lower Band was tracking the bricks closely, and RSI was approaching the overbought (OB) zone. This was not yet the time to sell. The Sell setup was complete only after a bearish reversal brick closed below the Lower Band, Momentum Plot crossed below zero, and RSI crossed below 50, in that order. That is the difference between noticing that price has risen a long way and having a confirmed reason to open a short position.
Looking back at a completed decline, it is easy to think you should have sold earlier. But an entry must be based on the signals that were actually available at the time. Do not let the outcome of the entire move tempt you to move the entry back to a point the checklist did not permit.
5.3. Buy example – When a decline begins to reverse
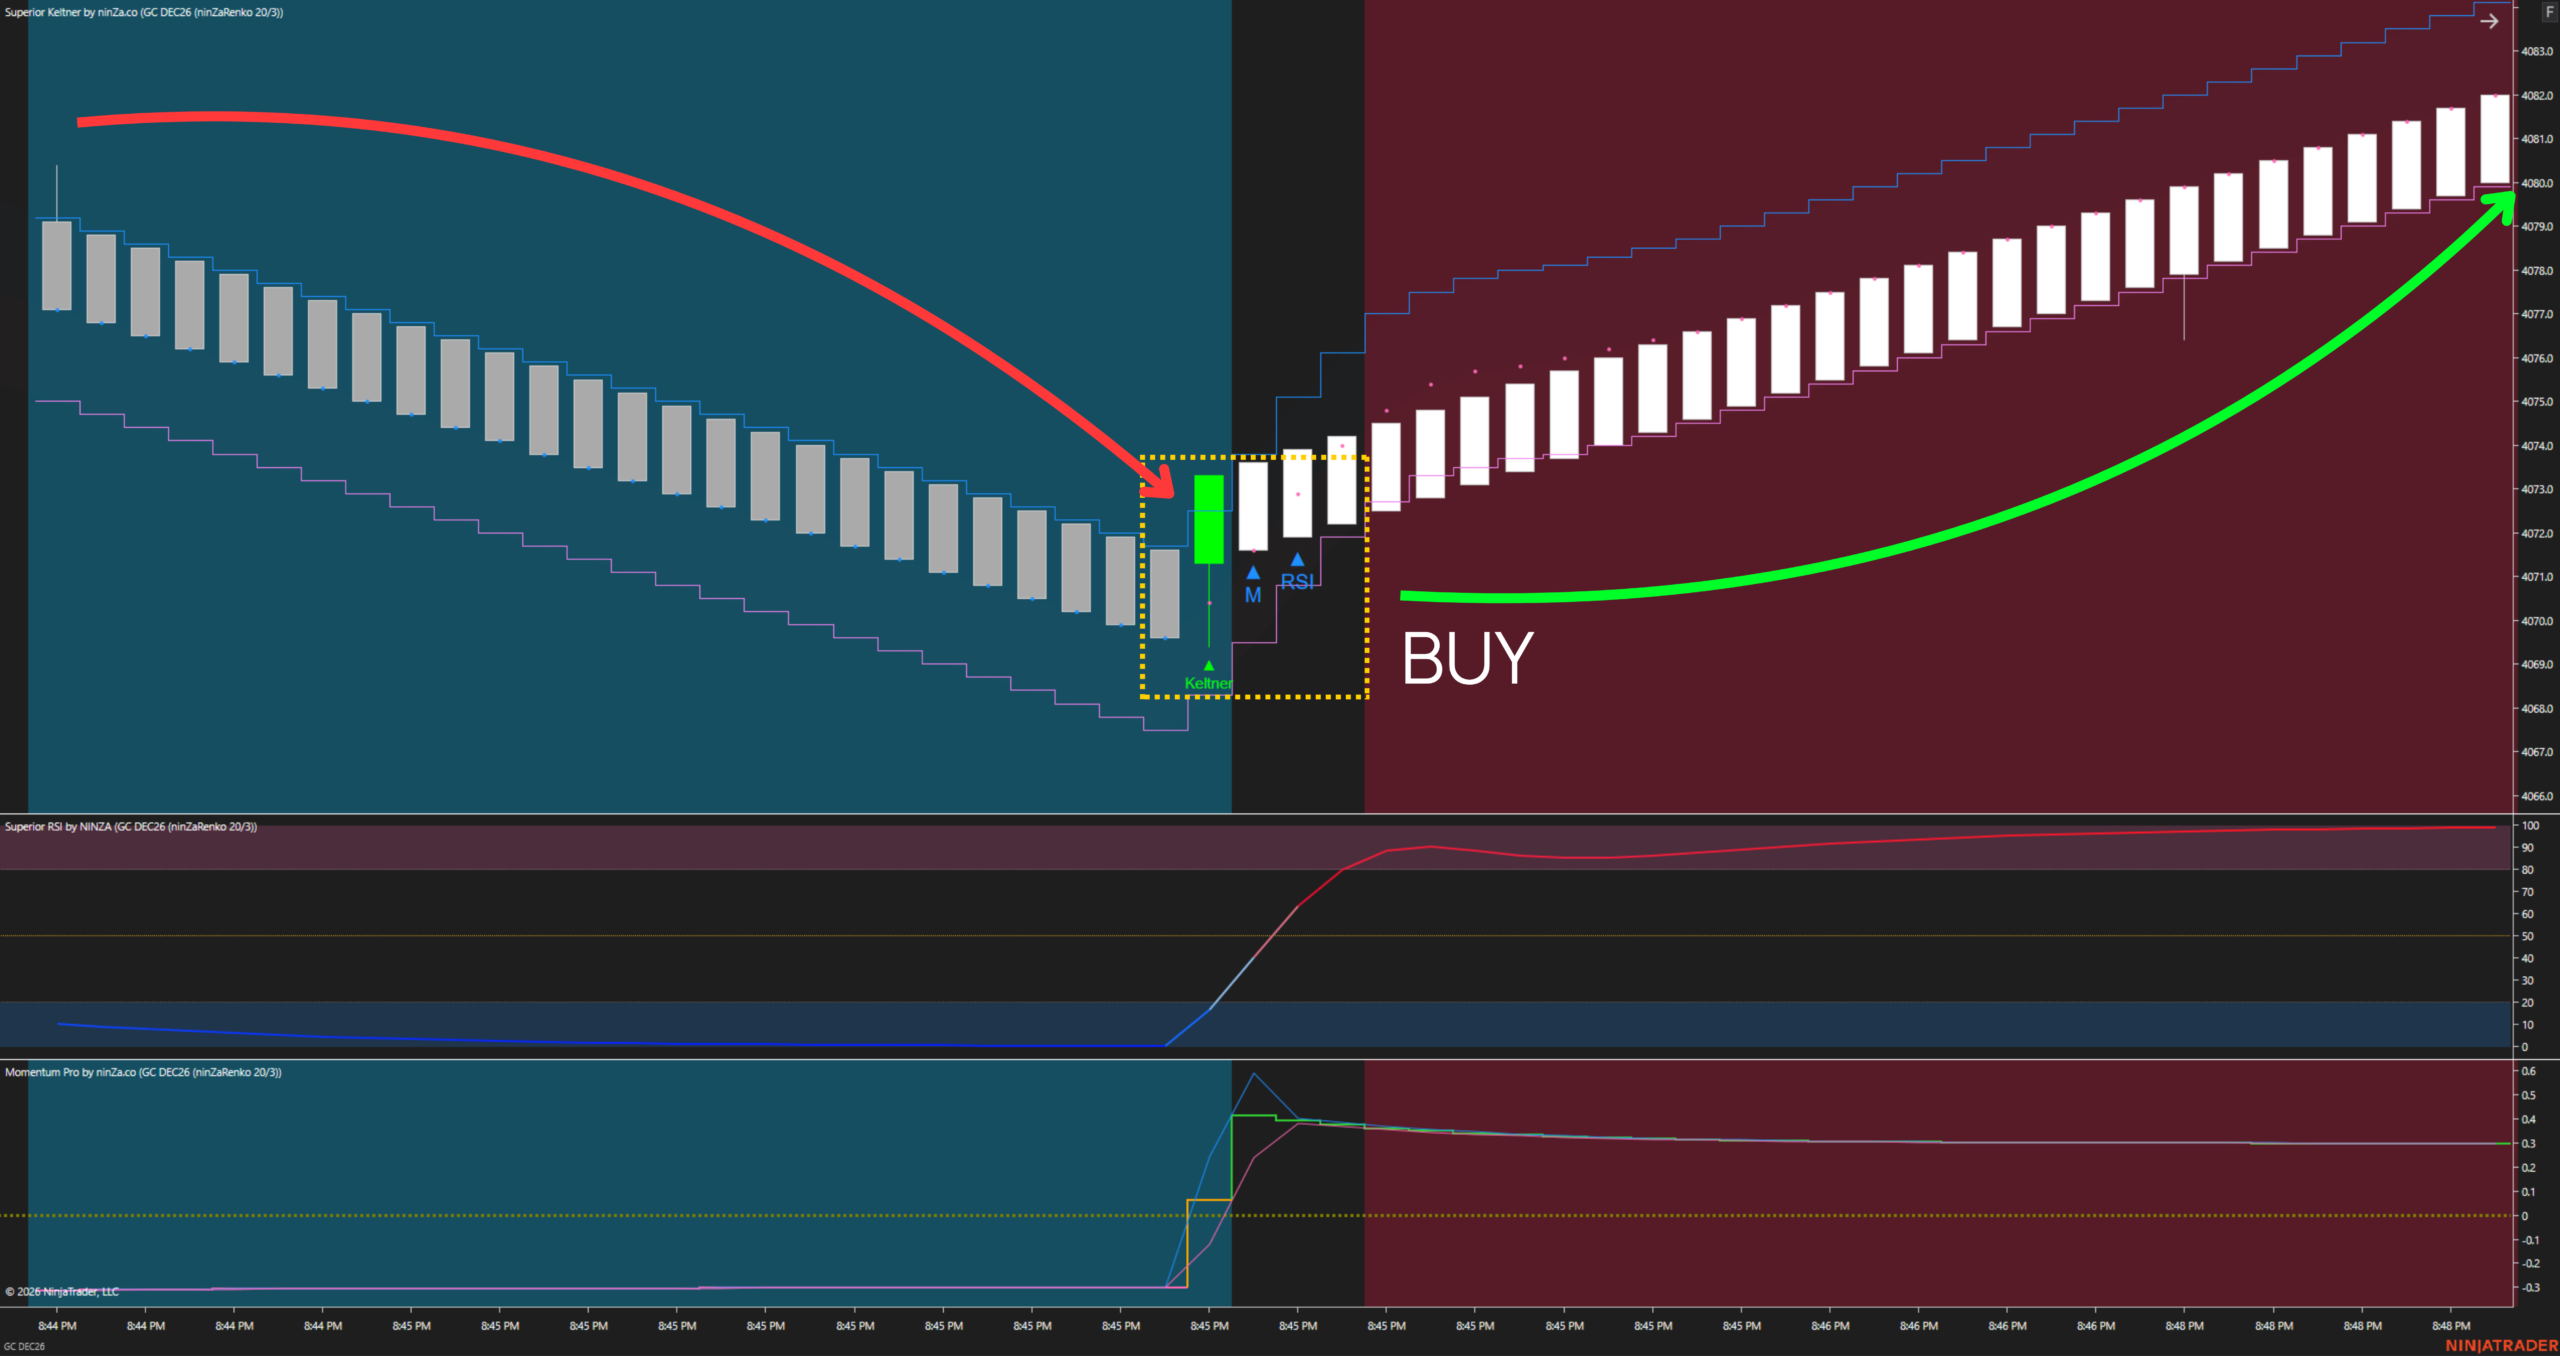
In the decline shown, the Keltner Lower Band slopes downward while the Upper Band follows the bearish bricks. RSI enters the oversold (OS) zone. When a bullish reversal brick closes above the Upper Band, the first signal appears, prompting the trader to keep watching. Momentum Plot then crosses above zero, and RSI moves above 50 to complete the Buy setup. Reading the full sequence helps you avoid entering long as soon as a bullish brick appears near the end of a downtrend.
5.4. When to wait or skip the setup
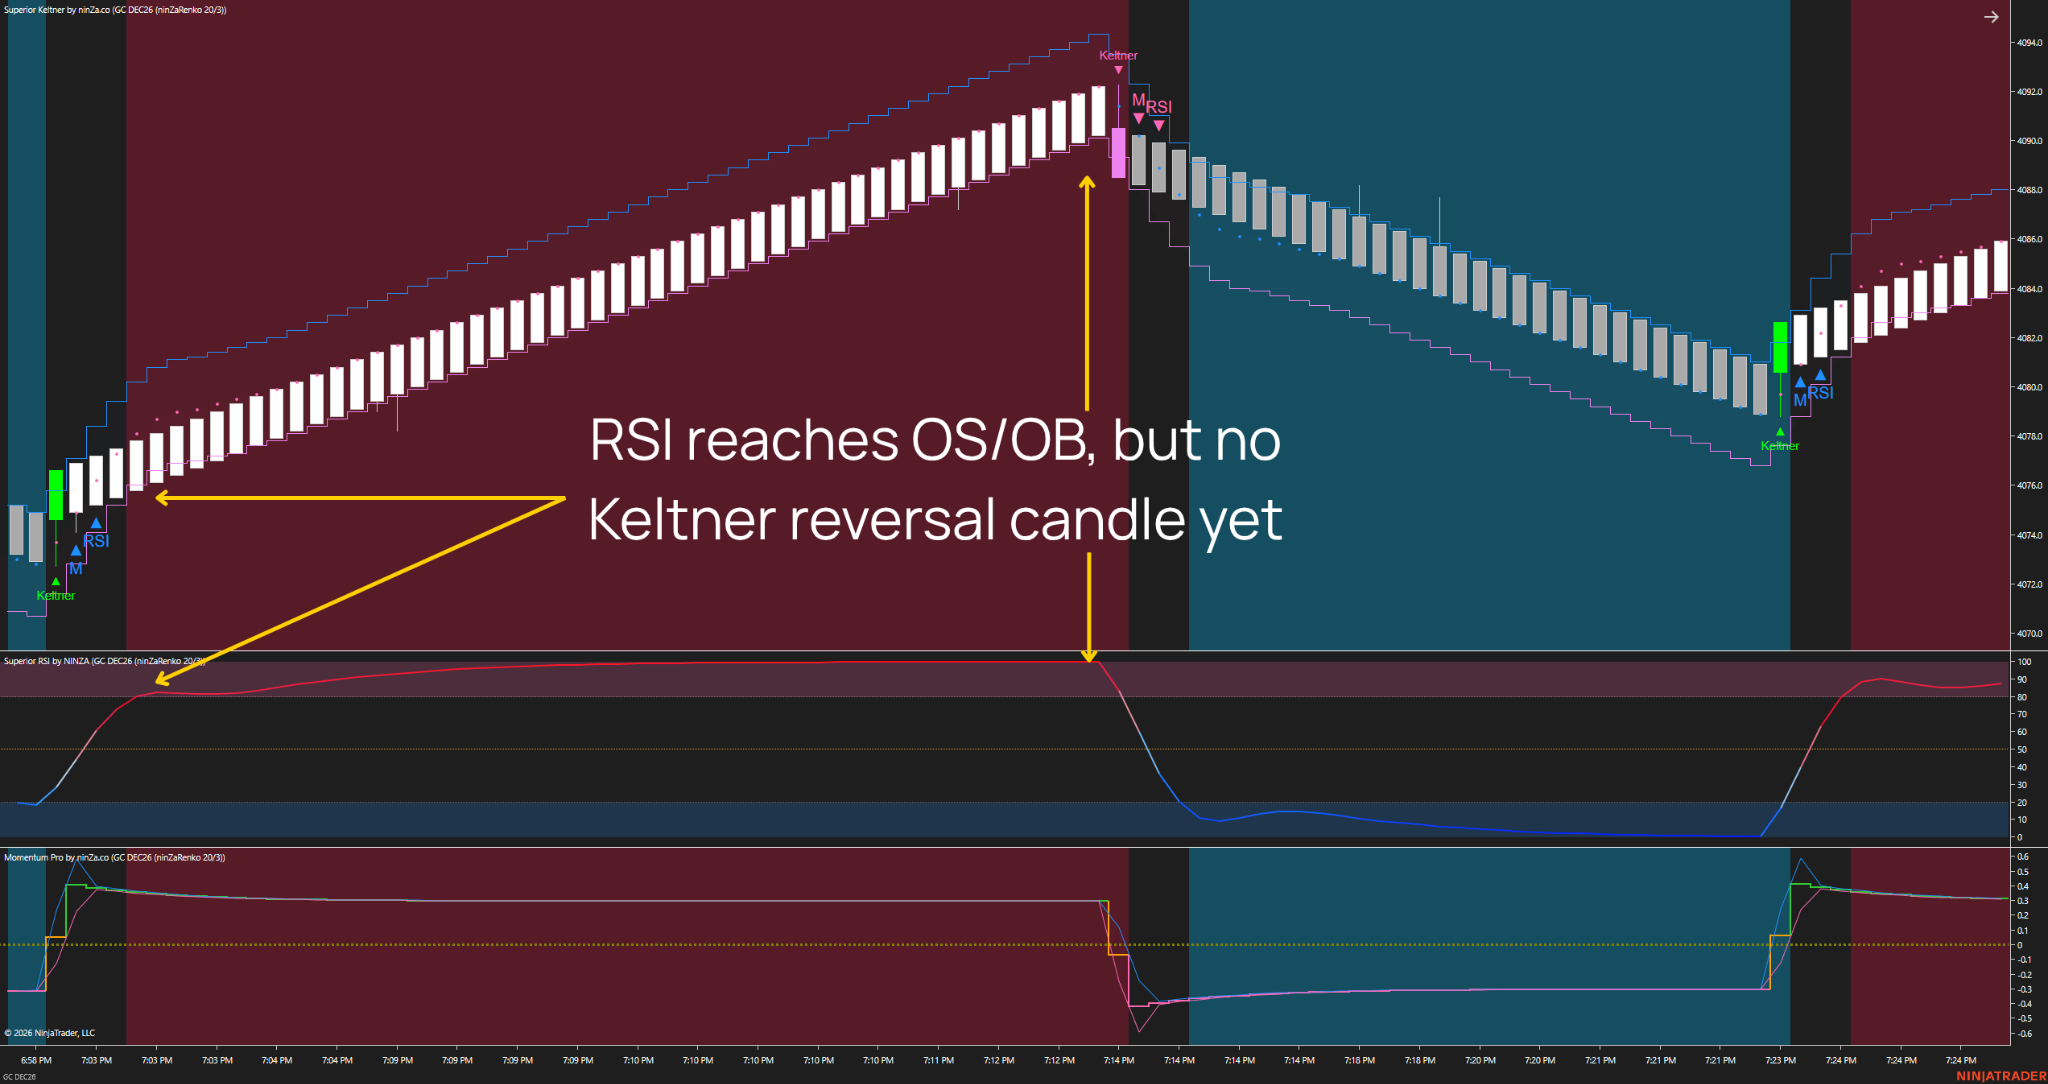
Case 1 – RSI has entered OS/OB, but no Keltner reversal brick has appeared. This establishes context only. Price may still continue sharply higher or lower. Do not buy solely because RSI is oversold or sell solely because it is overbought.
Case 2 – Price touches or moves through a band, but the brick has not closed beyond it in the required direction. Step 2 has not been met. Wait for the brick to close rather than predicting where it will finish.
Case 3 – Superior Keltner has produced a signal, but Momentum Plot has not crossed the zero line. Momentum has not confirmed the new direction at Step 3. Keep watching.
Case 4 – The Superior Keltner signal and Momentum Plot confirmation are in place, but RSI has not crossed 50 in the required direction. The setup is still incomplete. Remember this when managing a profitable trade: an opposing signal that has not completed all 4 steps is not, by itself, a reason to exit.
Practical chart-reading tip
On a completed chart, almost any entry can look easy to spot. To practice the right skill, cover the price action on the right side and reveal 1 brick at a time. Mark an entry only when the final confirmation step actually appears. Do not move the entry backward using information that came later.
Continue reading → Chapter 6: Trading tips – Practical lessons to sharpen your edge