
Chapter 6: Recommended settings & validation process
Recommended settings provide a practical starting point for configuring both Expansion Entry Scalping Solution setups across several Renko chart ratios.
These settings should not be treated as universal defaults. Market behavior can vary by instrument, session, liquidity condition, and trading cost. Use the configurations below as a starting point, then validate them against your own trading environment.
1. Recommended settings for setup 1
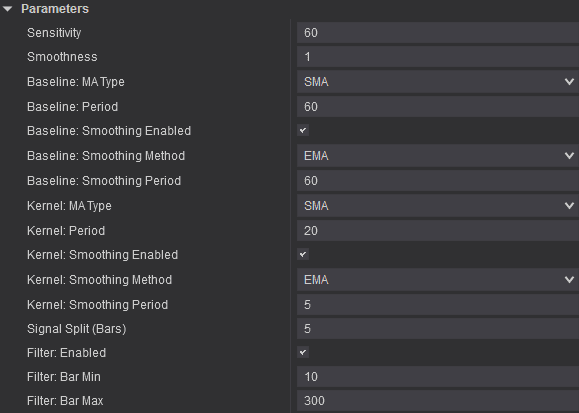
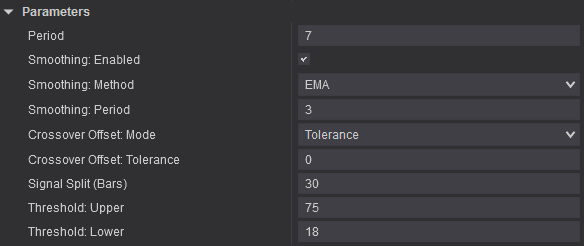
Recommended settings for a 20/4 Renko chart
Noble Cloud
Entropy Voltex
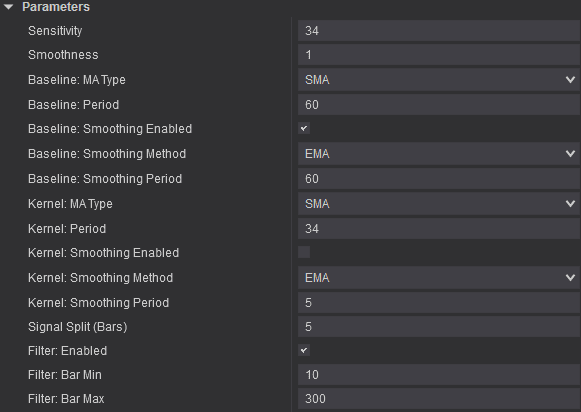
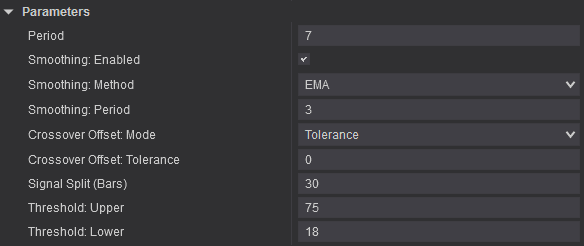
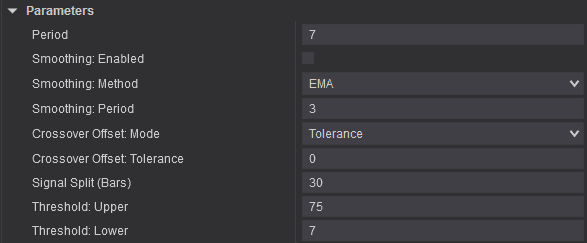
Recommended settings for a 12/4 Renko chart
Noble Cloud
Entropy Voltex
Recommended settings for a 30/10 Renko chart
Noble Cloud
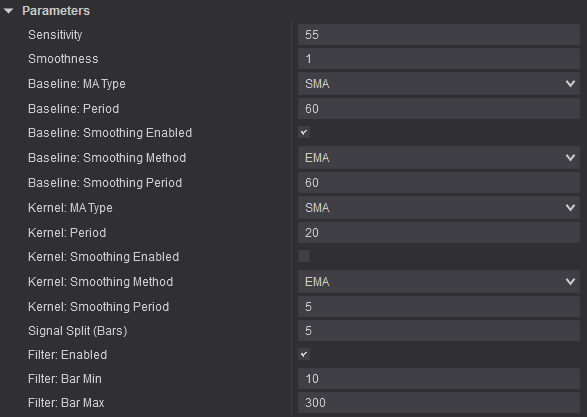
Entropy Voltex
2. Recommended settings for setup 2
Recommended settings for a 20/4 Renko chart
Bollinger %B Pro
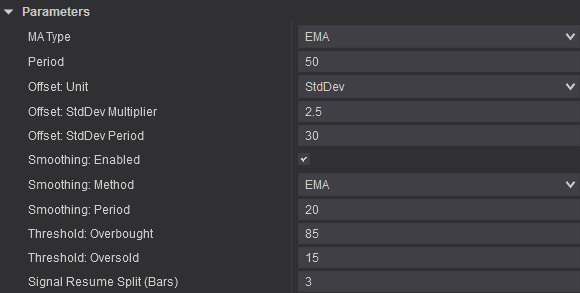
Entropy Voltex
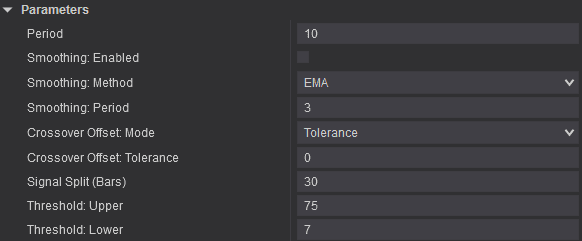
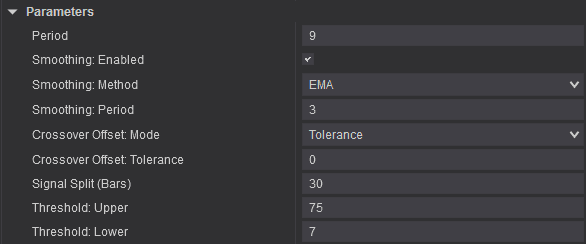
Recommended settings for a 12/4 Renko chart
Bollinger %B Pro
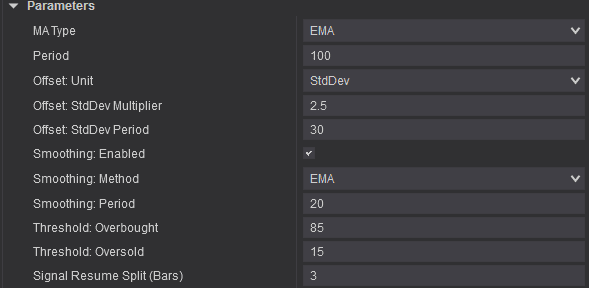
Entropy Voltex
Recommended settings for a 30/10 Renko chart
Bollinger %B Pro
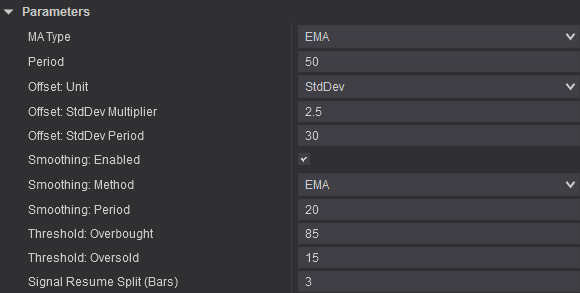
Entropy Voltex
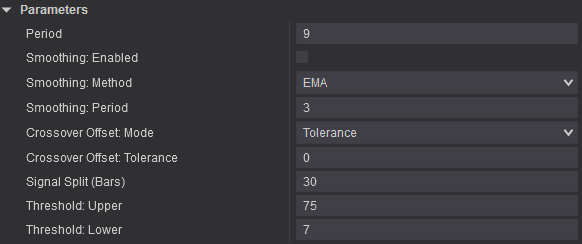
3. Validation process before live trading
The recommended settings are only a starting point. Do not assume that a single parameter set will produce the same results across every instrument, trading session, or liquidity condition.
Before risking real capital, validate the setup using your specific chart type, instrument, timeframe, and trading costs.
Step 1 – Backtest across multiple market conditions
Backtest over a sufficiently long data sample that includes multiple market regimes: trending, range-bound, high-volatility, and low-volatility conditions.
Step 2 – Set aside separate validation data
Do not optimize the settings across the entire dataset and then use that same data to evaluate performance. Doing so can lead to overfitting.
Step 3 – Forward test in simulation
Forward test in a simulated account. Record the win rate, average win, average loss, maximum drawdown, trading costs, and slippage.
Step 4 – Transition to live trading gradually
Move to live trading at a small position size only when the forward-test results do not differ materially from the backtest and you can follow the checklist consistently.
Records to retain
Keep setup screenshots, entry and exit times, the reason for each entry, the settings used, and the results after fees.
This journal helps distinguish system errors from execution errors.
Important note: The academic literature and reference materials cited in this guide support only the underlying principles of risk management, trading behavior, momentum, and volatility measurement.
They do not validate the specific performance of the Expansion Entry Scalping Solution. Product performance must be confirmed through each user’s own backtesting and forward testing.