
Curated indicator combos available at the strongest exclusive offers. Explore now →
Sale!
![[AbsP] MEO #8: Origin Recoil + Sumo Pullback$](https://renkokings.com/wp-content/uploads/origin-recoilsumo-pullback-fresdsfsdfsdfsdfsdffgvfdgghbdgdsfg.png)
[AbsP] MEO #8: Origin Recoil + Sumo Pullback$
Original price was: $1,092.$350Current price is: $350.
This featured MEO bundle includes exclusive pricing available only during the current release period.
Description
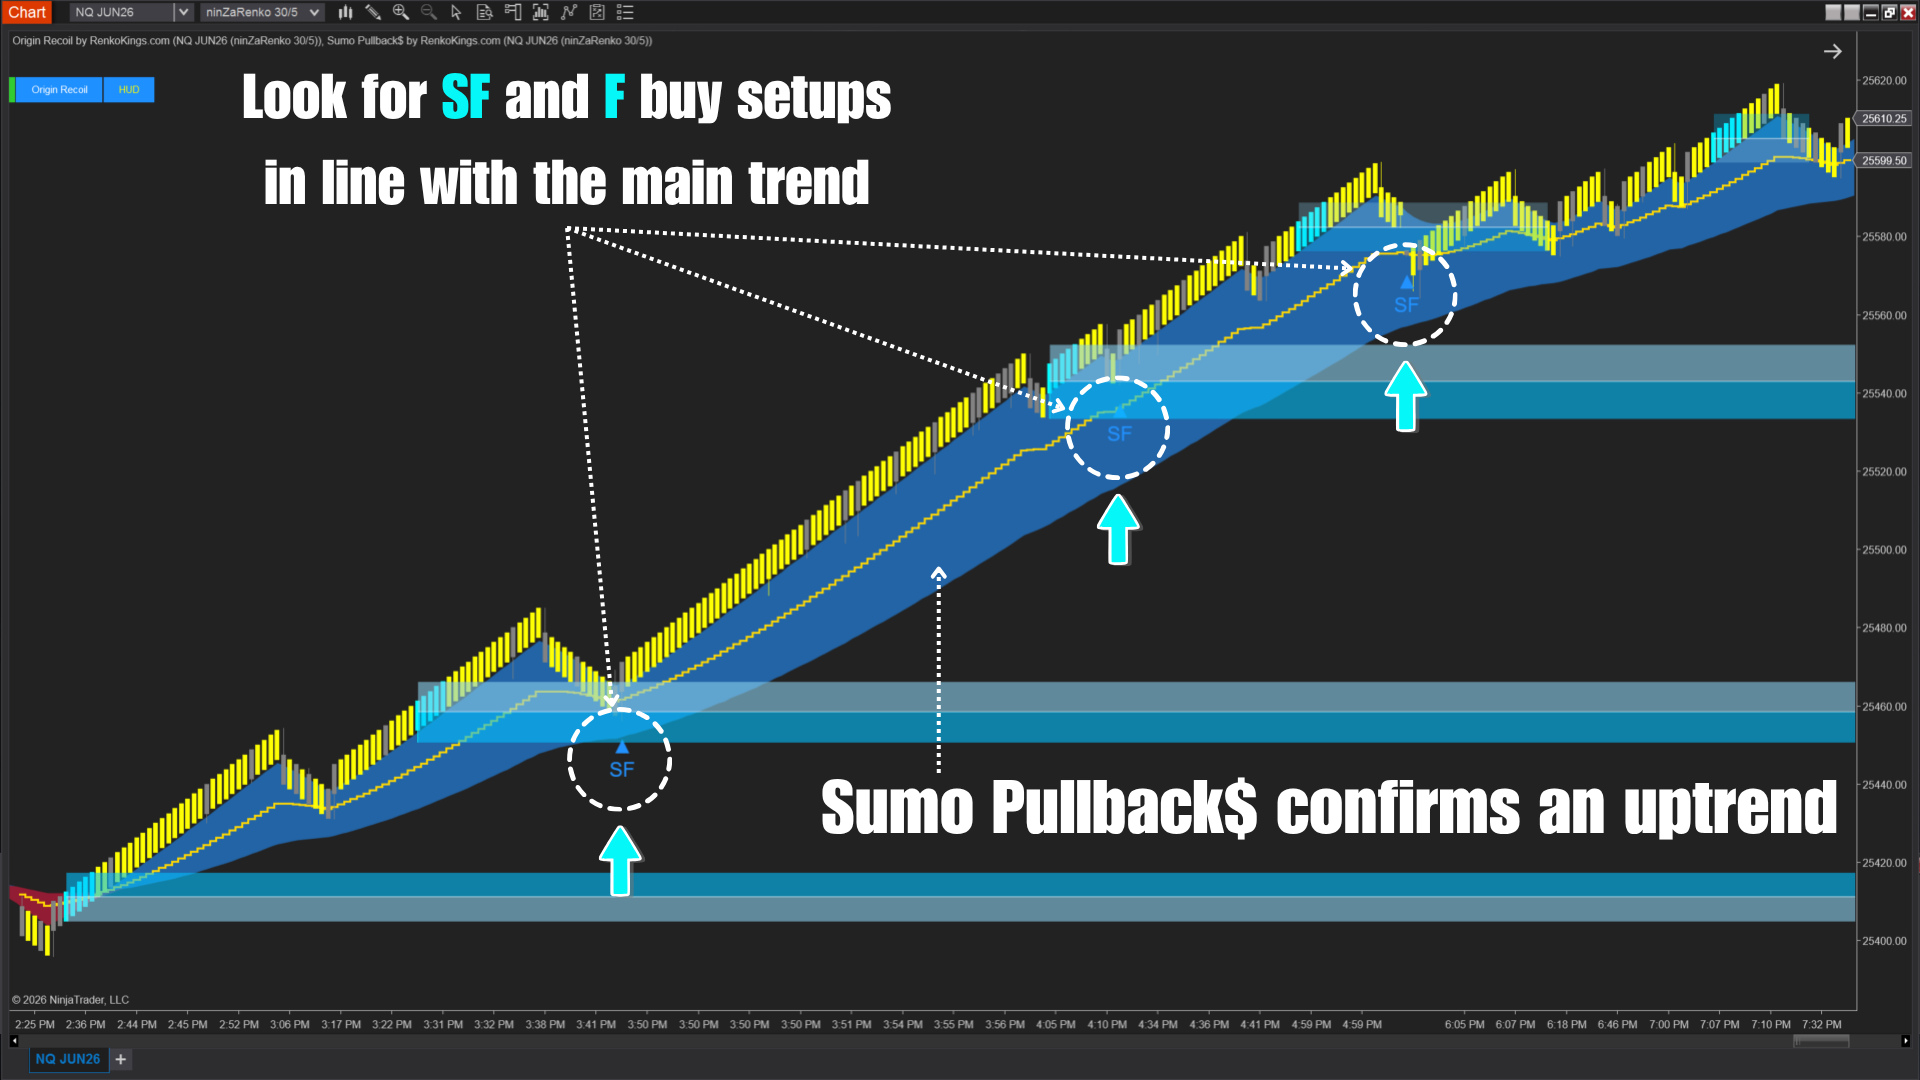
Origin Recoil + Sumo Pullback$ – Combine momentum quality with trend-aligned pullbacks
Most traders focus on structure first.
Trend.
Support and resistance.
Breakouts.
Pullbacks.
But strong trade location often depends on 2 things working together:
MOMENTUM + STRUCTURE
That is exactly where Origin Recoil and Sumo Pullback$ complement each other.
One helps reveal where aggressive momentum enters.
The other helps align pullback entries with trend structure.
The missing layer in many pullback setups
Many traders treat pullbacks the same.
But not all pullbacks form against the same momentum conditions.
Some pull back into strong continuation structure.
Others form against fading momentum.
That distinction matters.
Without reading both momentum quality and trend context, traders are often left guessing:
- Is this pullback likely continuation or failure?
- Is this reaction zone backed by real momentum?
- Is this trend still healthy or beginning to weaken?
This combination helps answer those questions.
Origin Recoil – Bringing time back into Renko
Origin Recoil measures something most indicators ignore:
The speed at which candles form – down to the millisecond
By comparing formation speed to recent market behavior, it reveals Burst Zones where aggressive momentum may be entering.
Origin Recoil helps evaluate:
- Where momentum enters the market
- Whether momentum is building or fading
- Where strong reaction zones may form
- Whether continuation conditions may still be intact
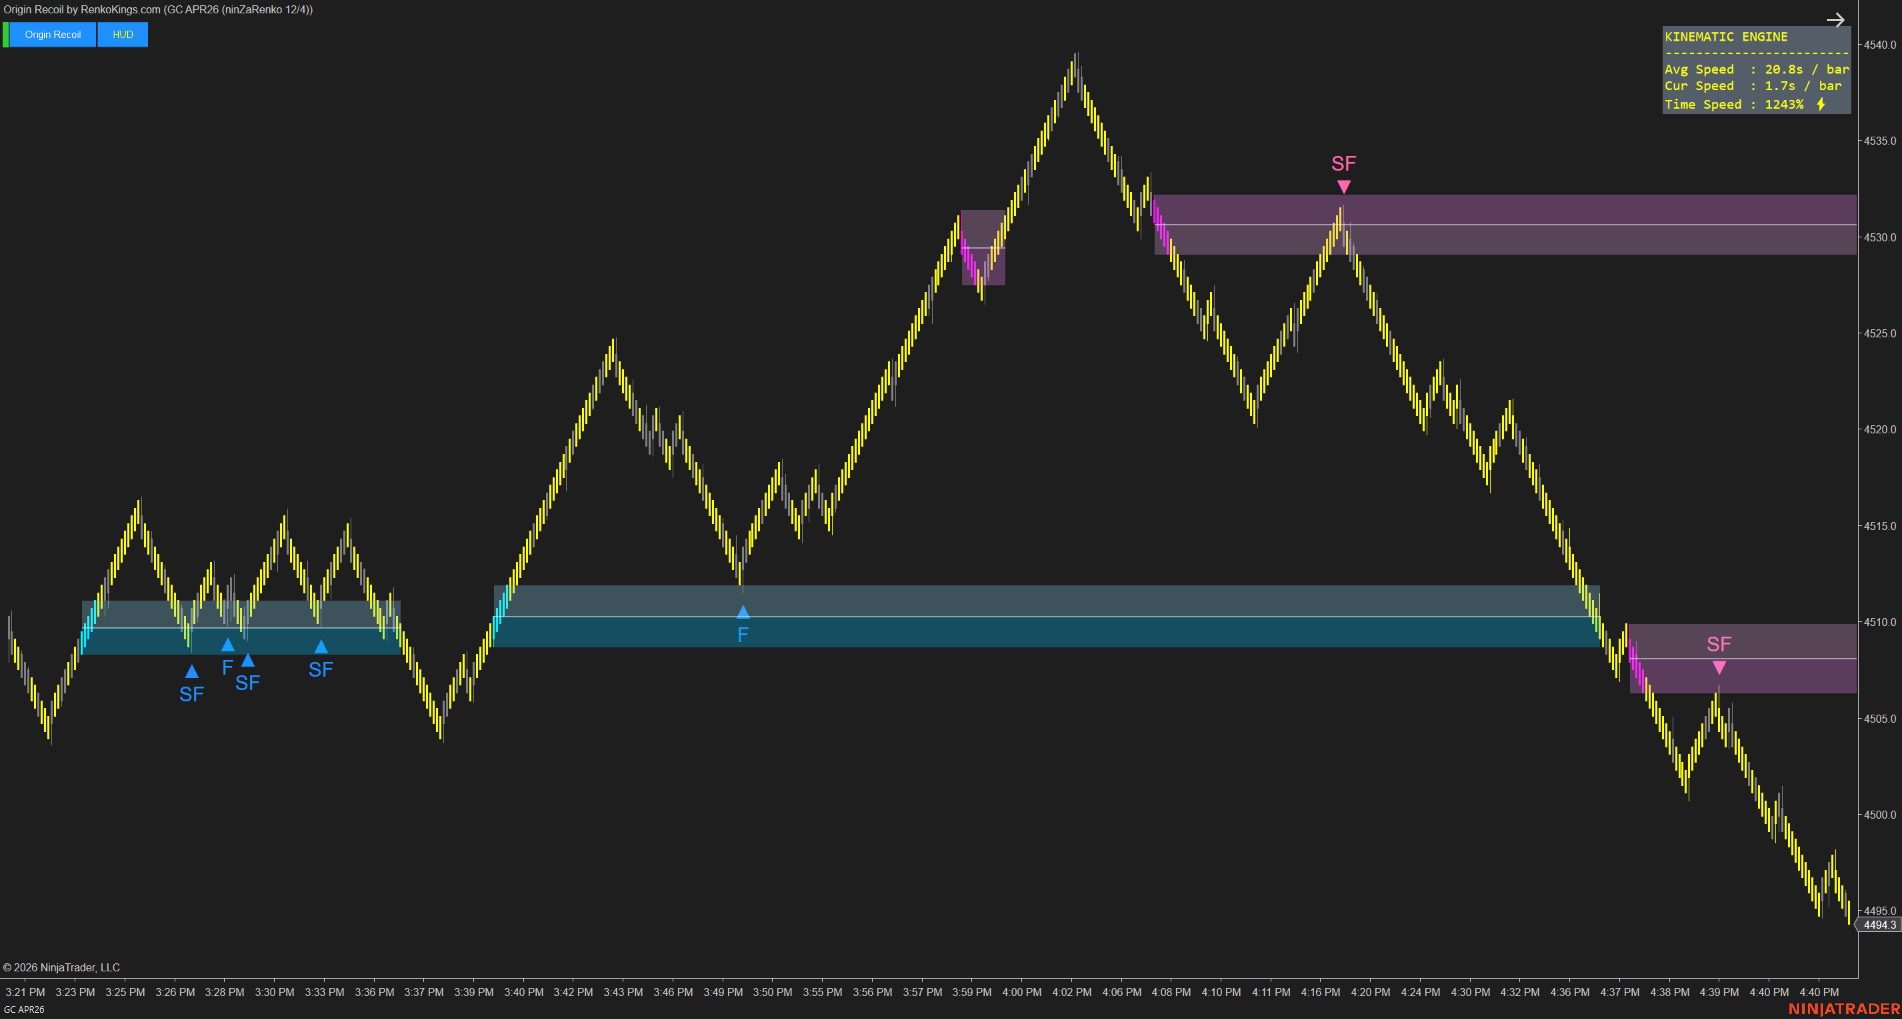
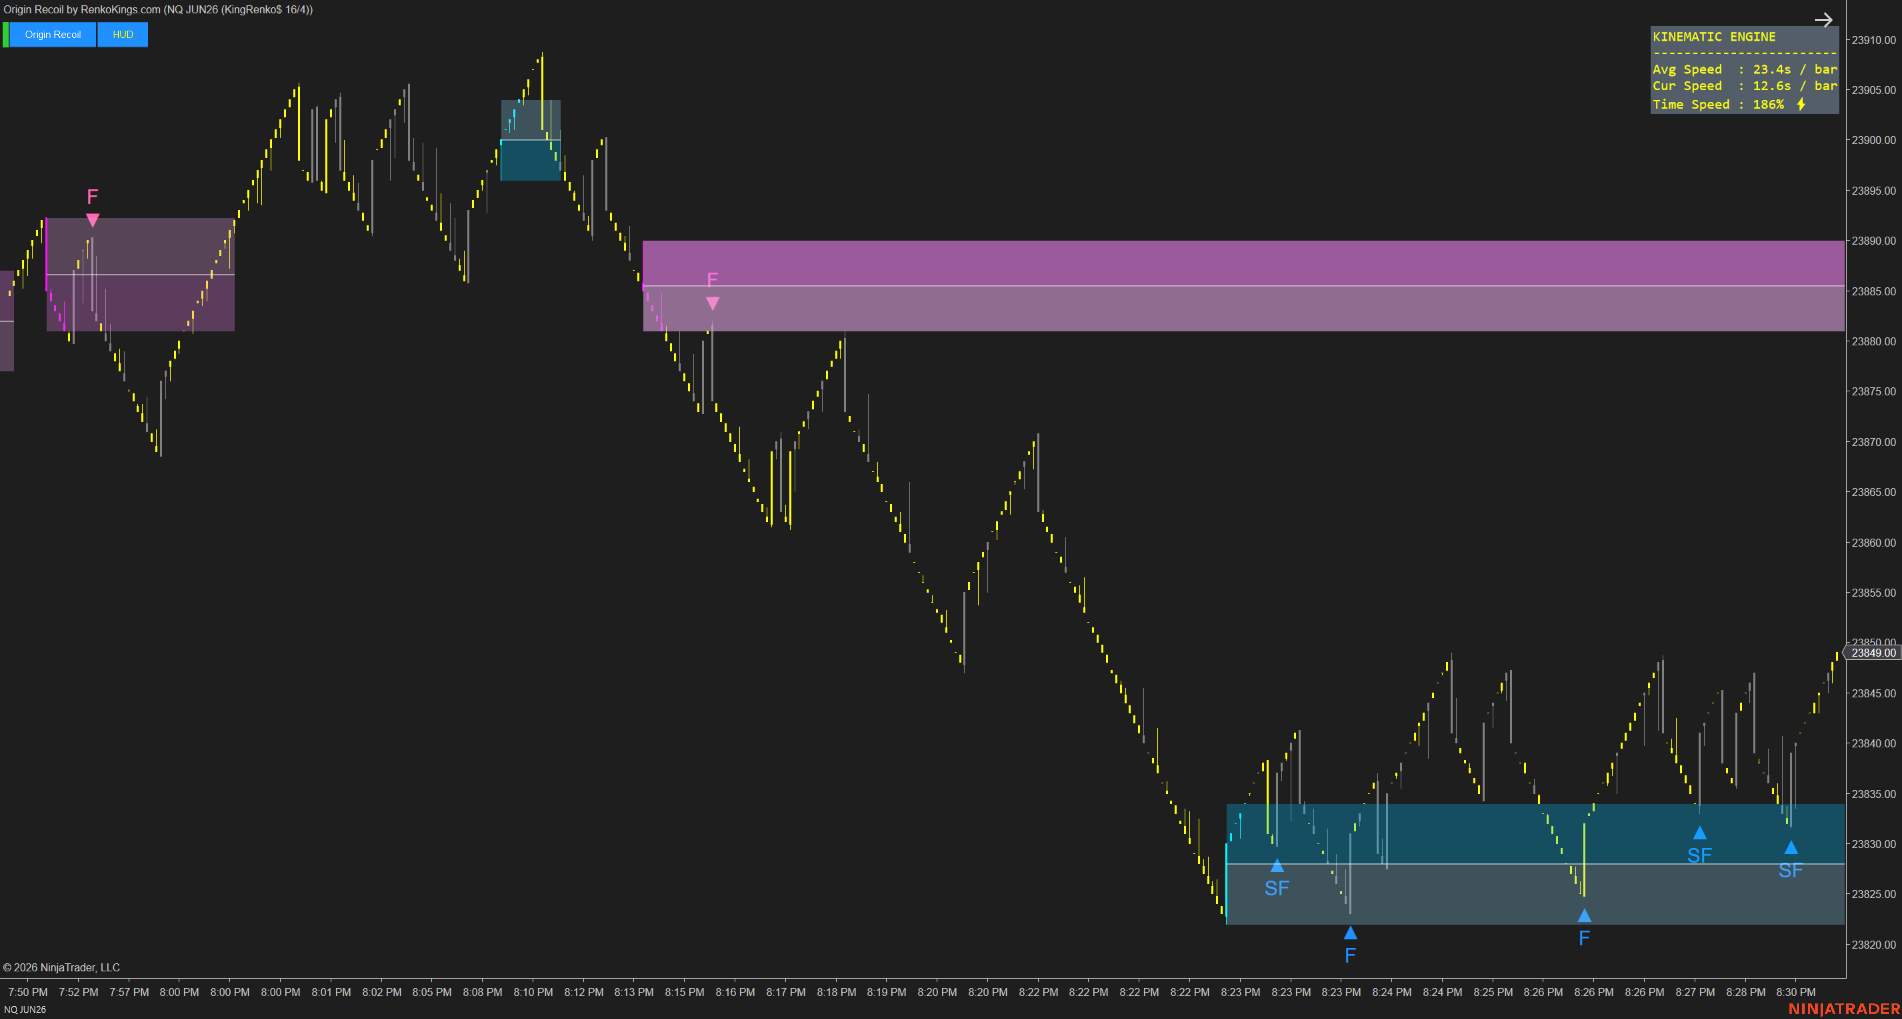
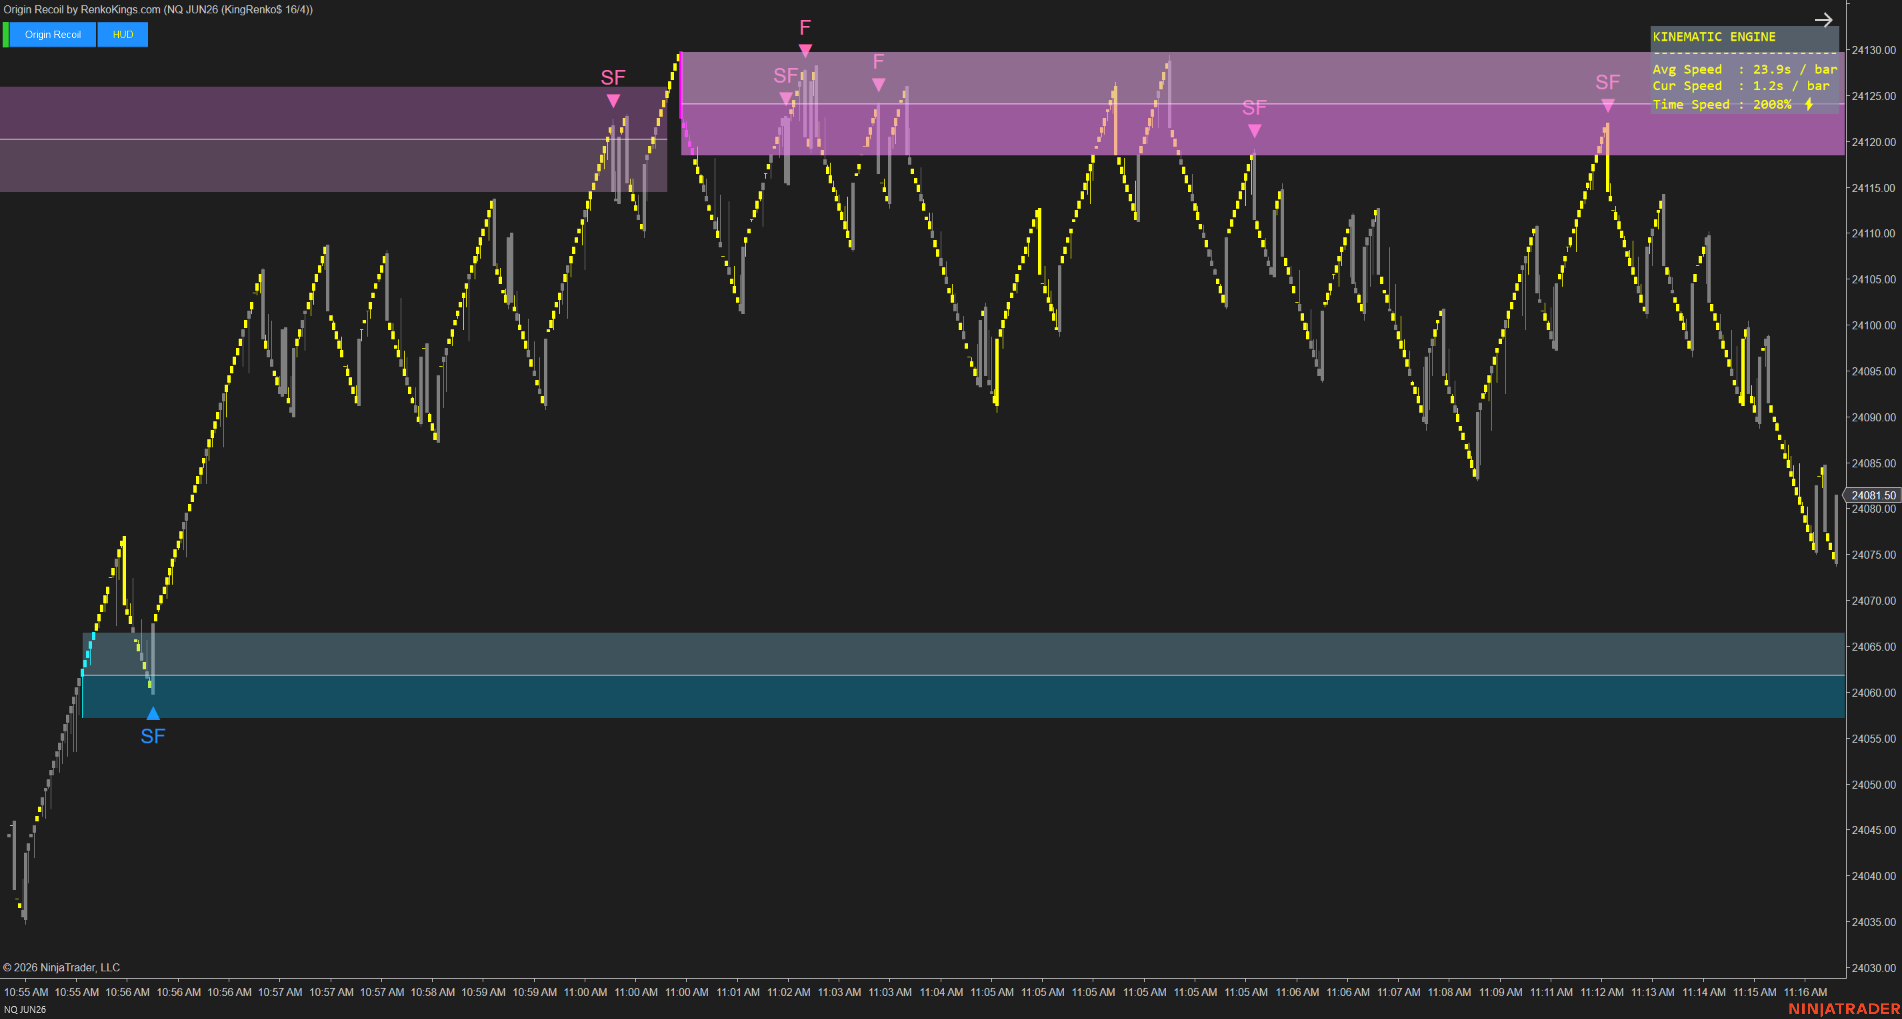
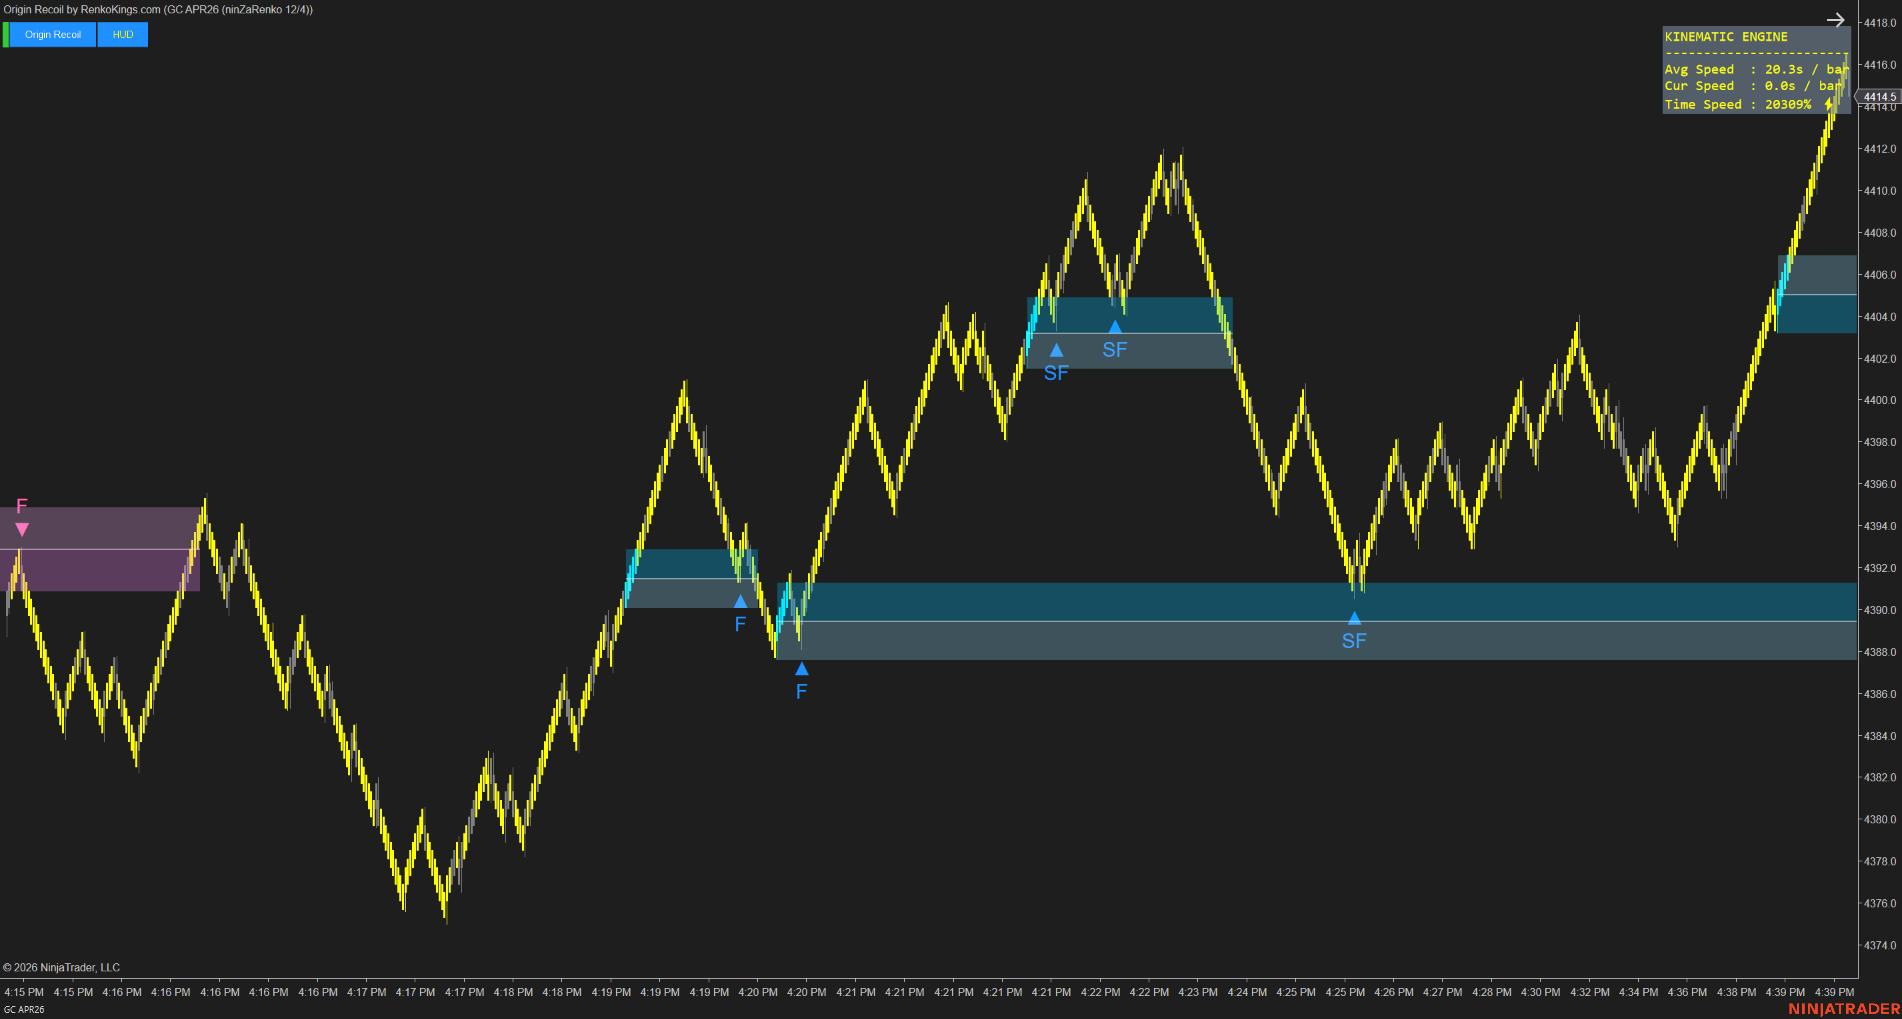
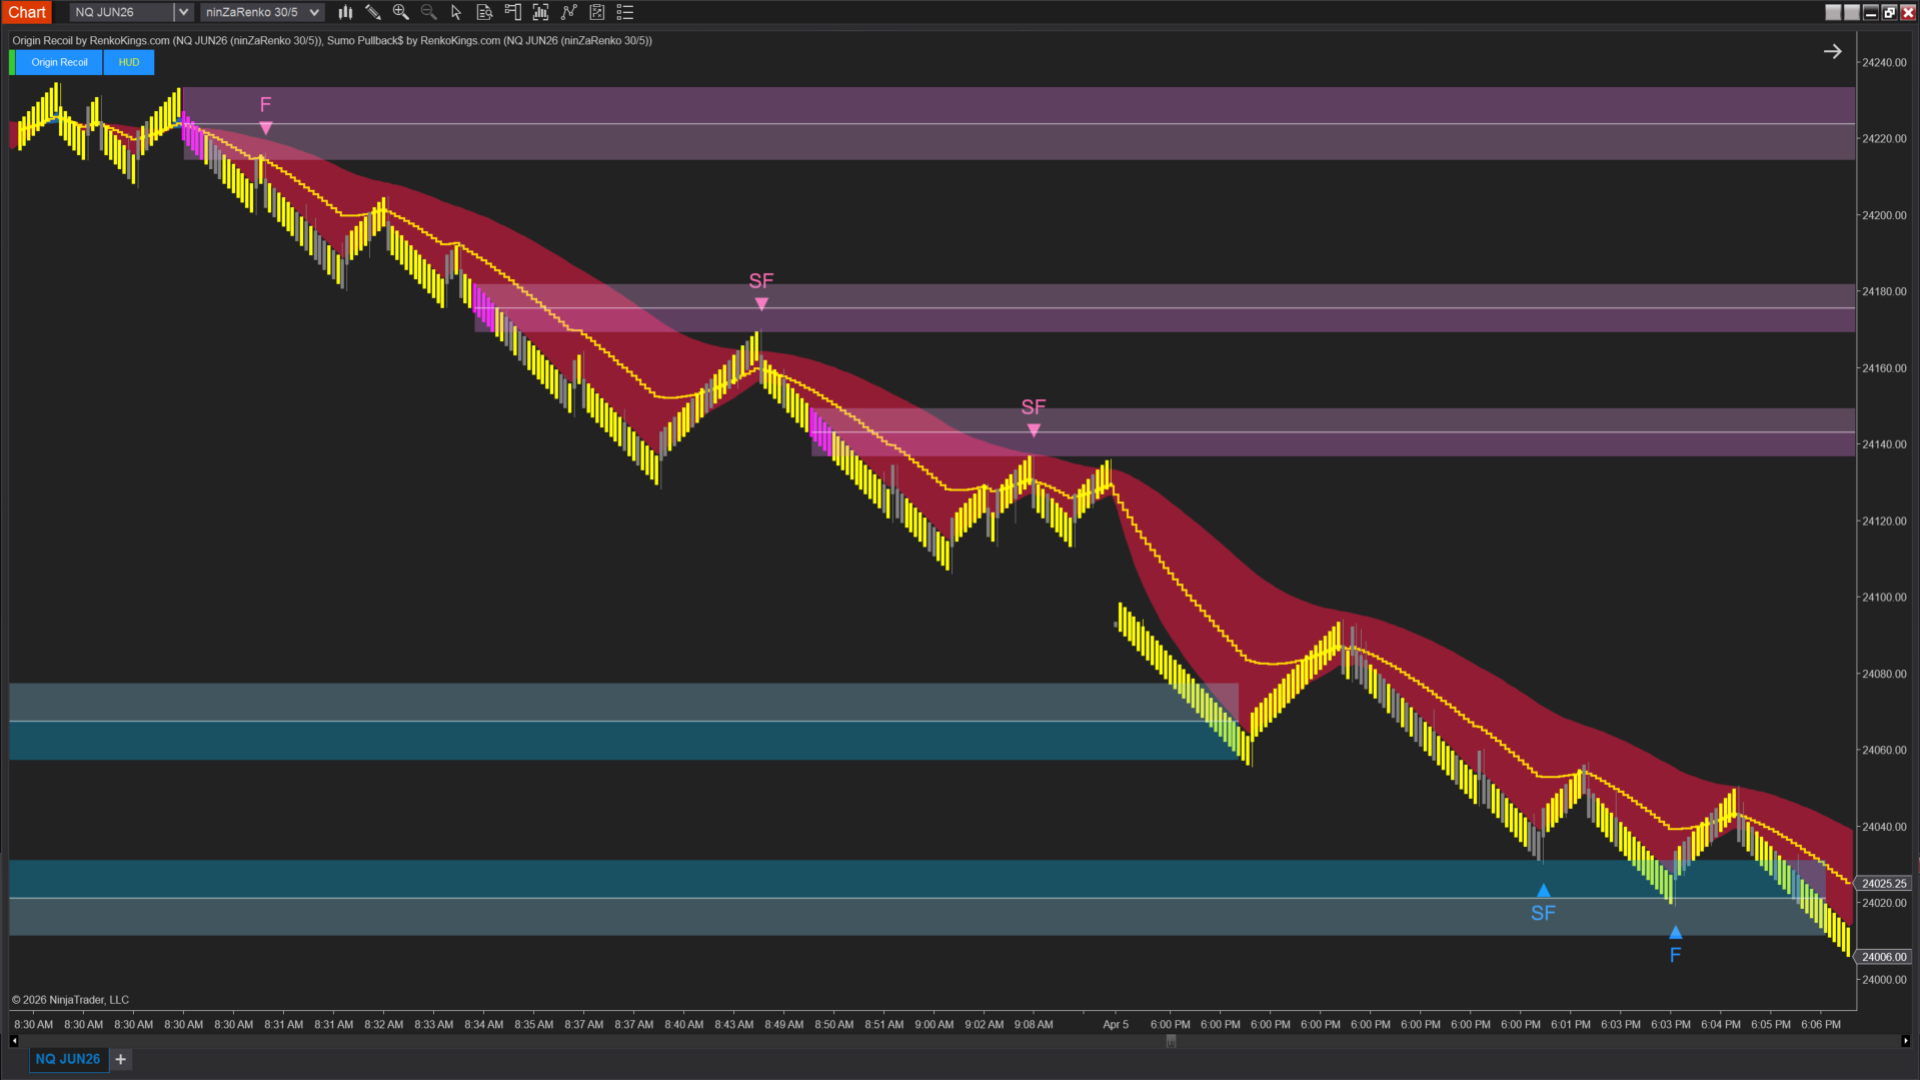
Burst Zones – Where momentum becomes visible
At the core of Origin Recoil are 2 momentum classifications:
Zone Type
Description
Typical Use
Fast Zone
Strong momentum relative to recent conditions
Useful for pullback entries in developing structure
Superfast Zone
Extreme momentum acceleration
Often associated with earlier continuation reactions
Not all momentum carries the same quality.
This helps distinguish the difference.
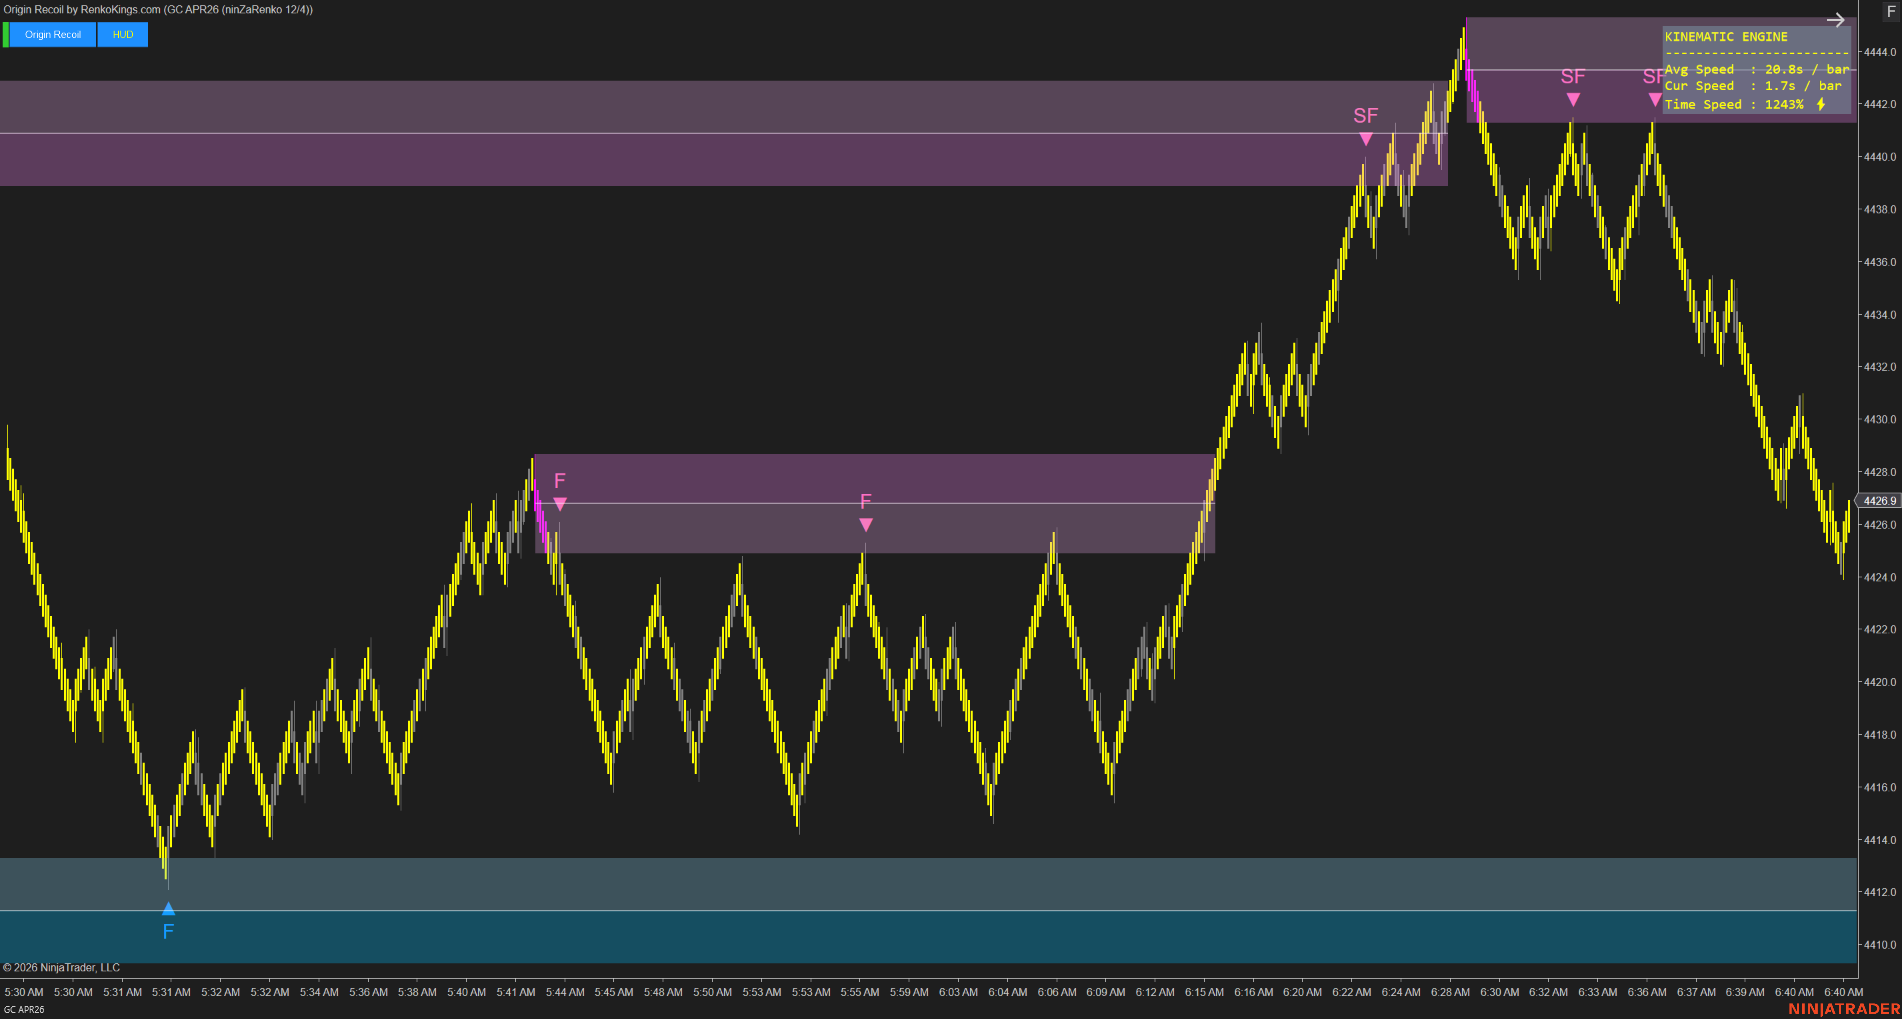
Internal momentum structure
Each Burst Zone contains 2 internal layers.
This helps evaluate how momentum evolves inside the move.
- If the upper layer forms faster – momentum is building
- If the lower layer forms faster – momentum is fading
That can matter significantly when price retests a zone.
Some zones react decisively.
Others require deeper pullbacks or fail.
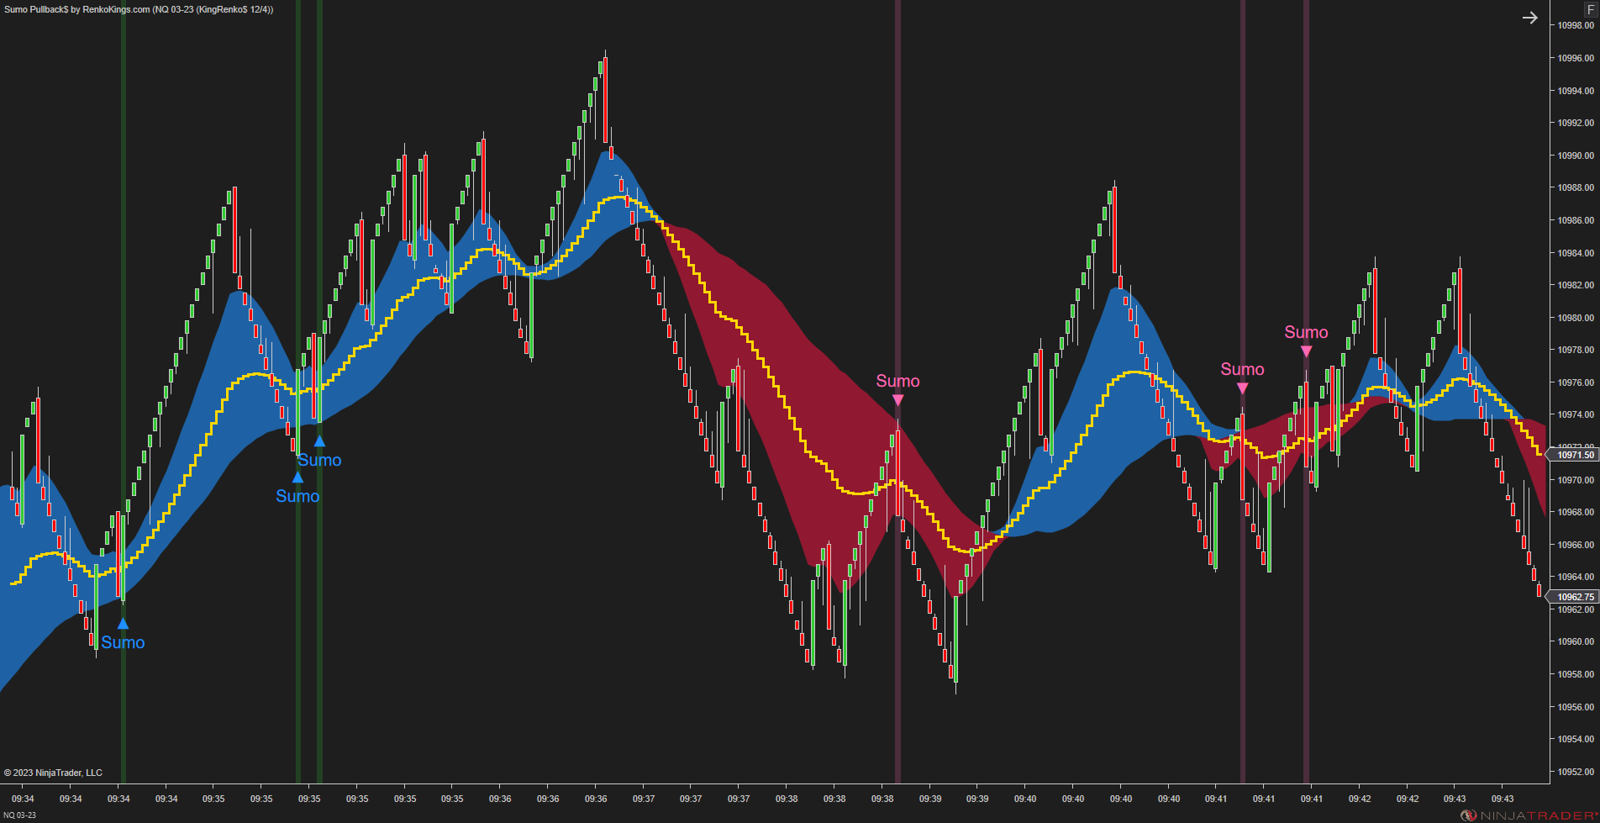
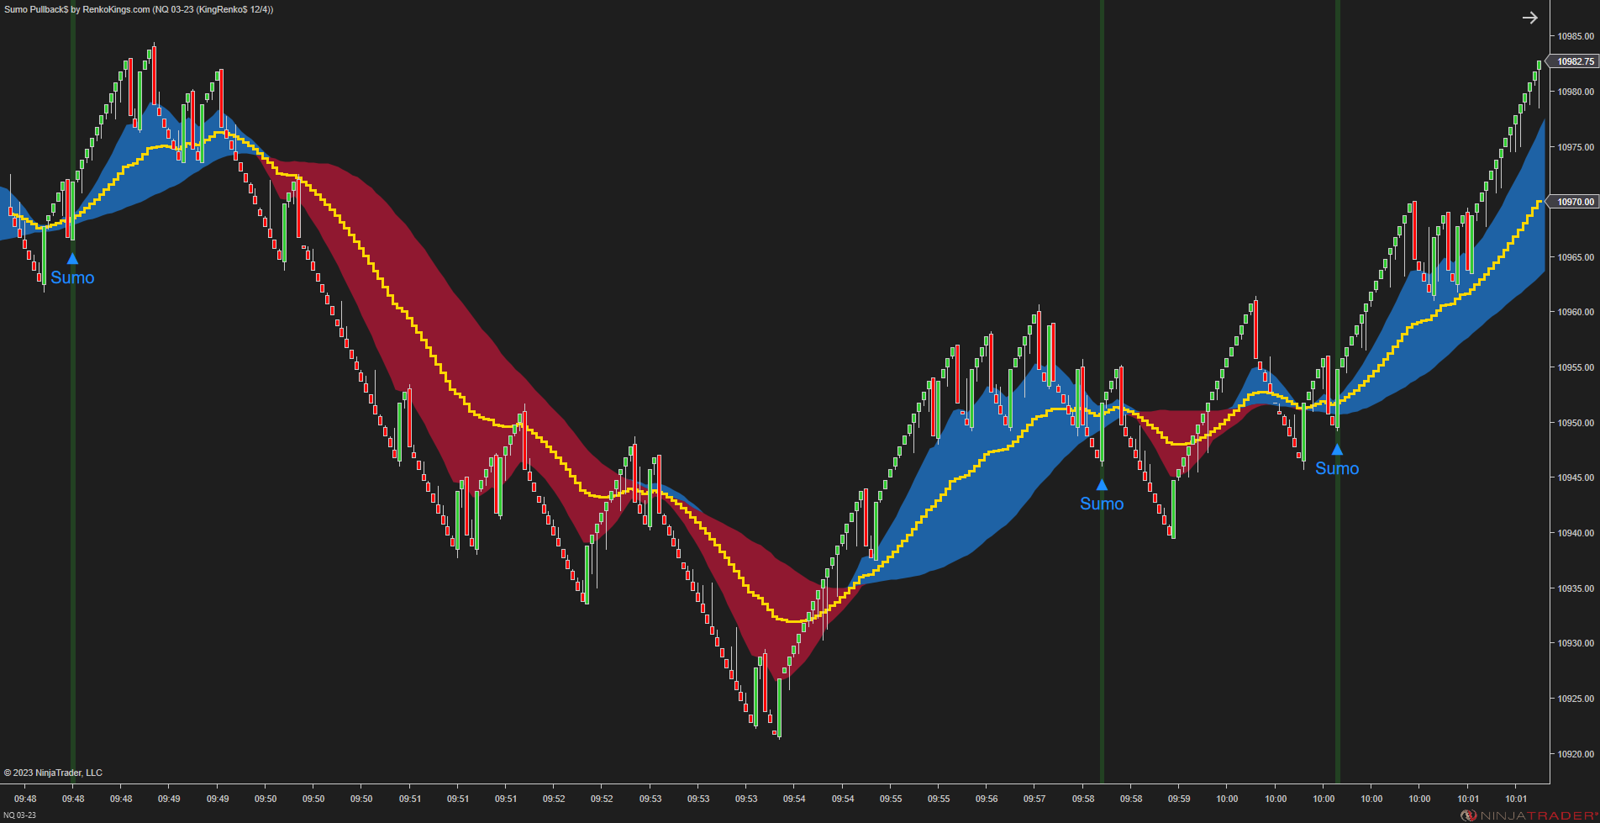
Sumo Pullback$ – Trade with trend structure
Momentum alone is not enough.
Context matters.
That is where Sumo Pullback$ adds an additional layer.
Its adaptive cloud structure helps define:
- Trend direction
- Trend quality
- Pullback conditions within trend
- When market structure may be too choppy to trade
Cloud behavior helps interpret conditions:
- Steeper expanding clouds – stronger trend structure
- Flat or mixed clouds – weaker or uncertain structure
Not every pullback deserves participation.
Sumo Pullback$ helps filter for stronger ones.
A Breakout isn’t defined by price alone. What happens next?
Get Noble POC Band today & receive our 2 latest Renko bars as a bonus →


Why these indicators fit together
These indicators solve 2 different problems.
Origin Recoil
- Identifies where momentum likely originated
- Highlights momentum-backed reaction zones
Sumo Pullback$
- Helps define trend conditions
- Filters pullbacks aligned with that trend
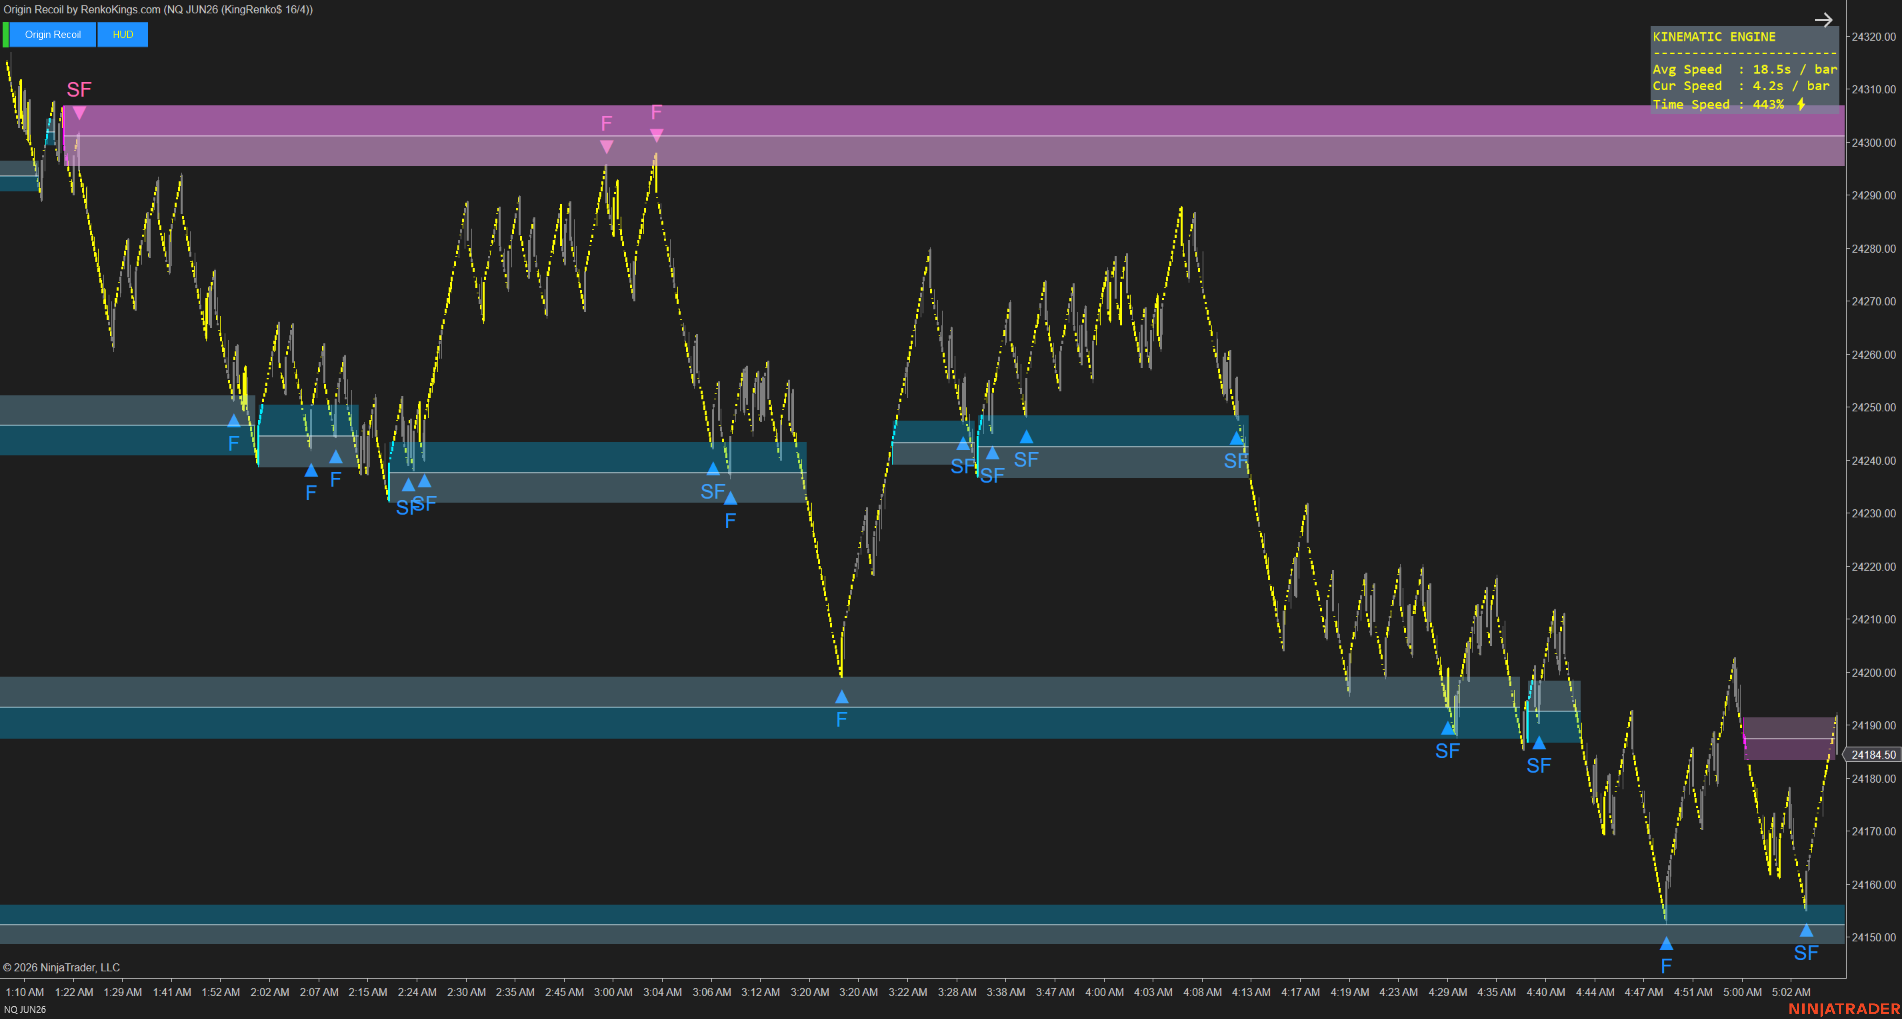
Together they provide a structured workflow:
- Use Sumo Pullback$ to define trend
- Use Origin Recoil to identify Burst Zones
- Use Fast and Superfast retests for pullback evaluation
Simple.
Structured.
Context-driven.
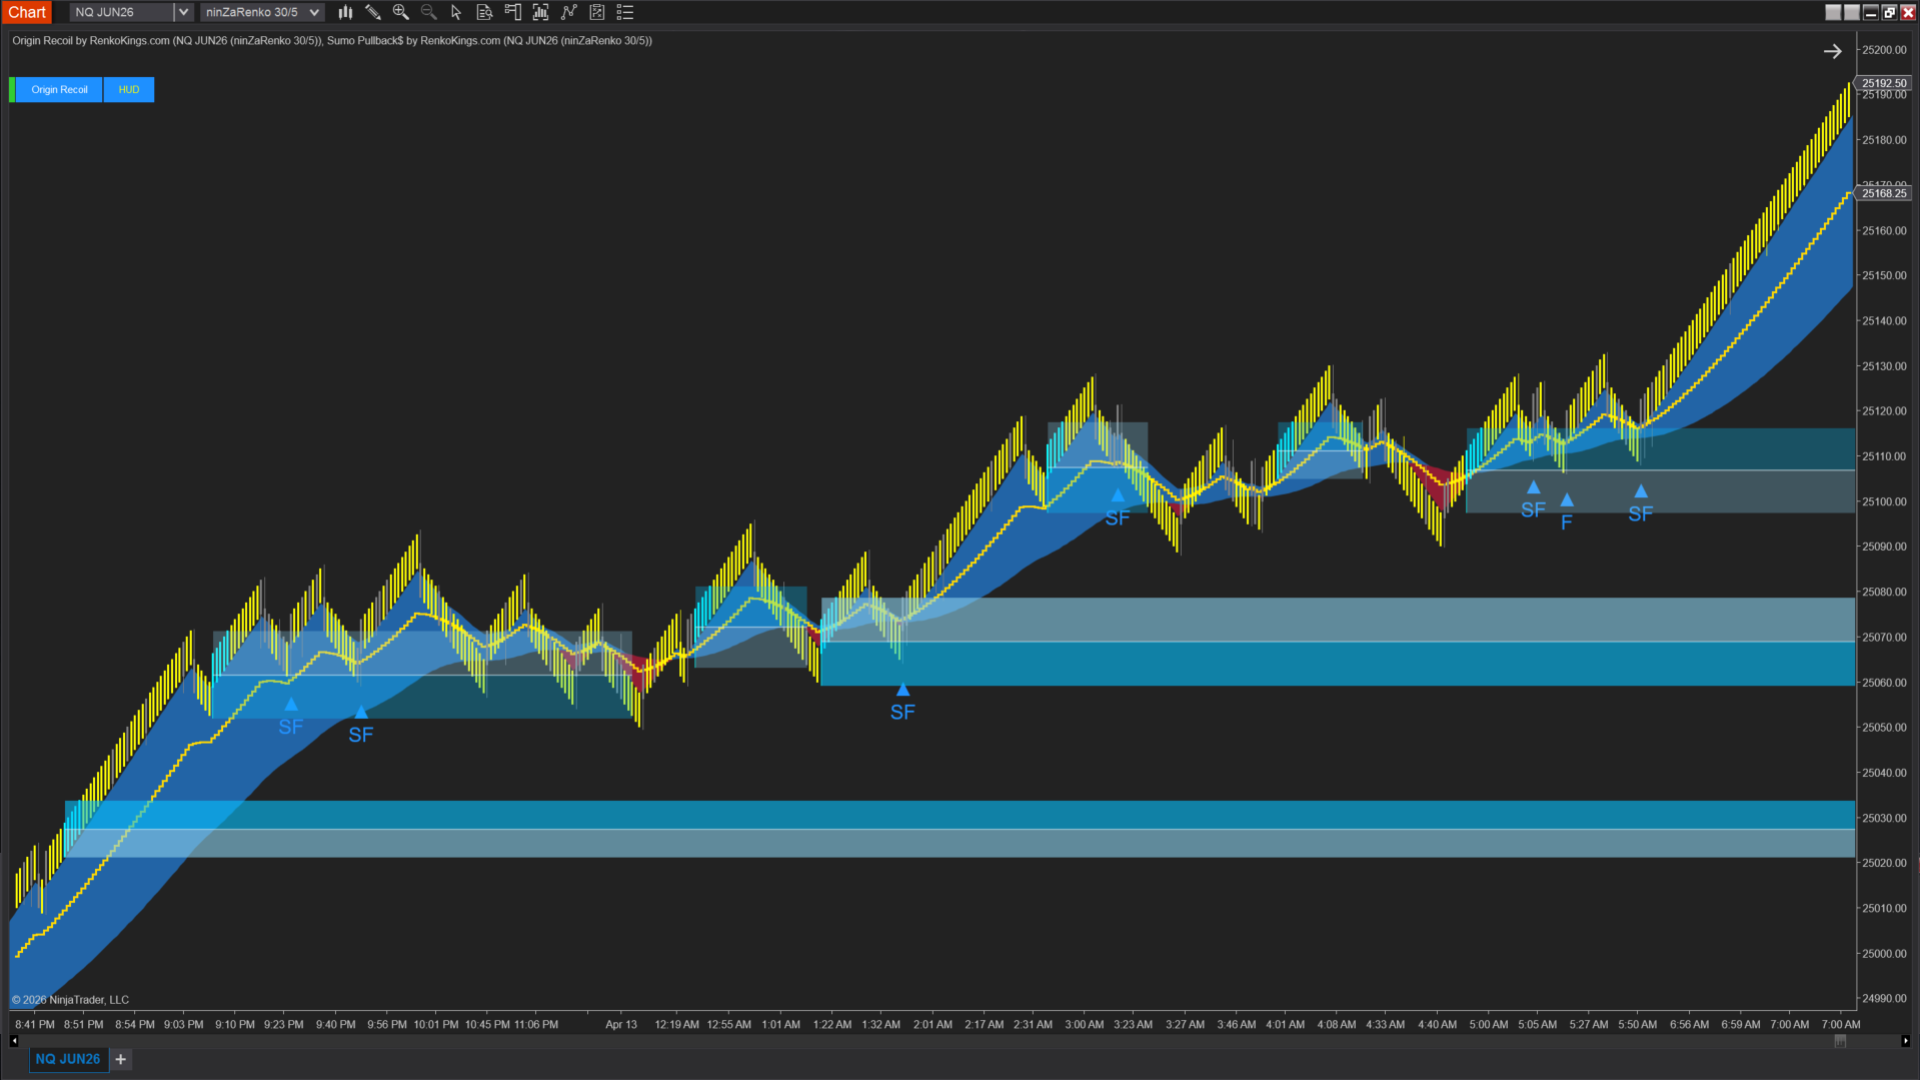
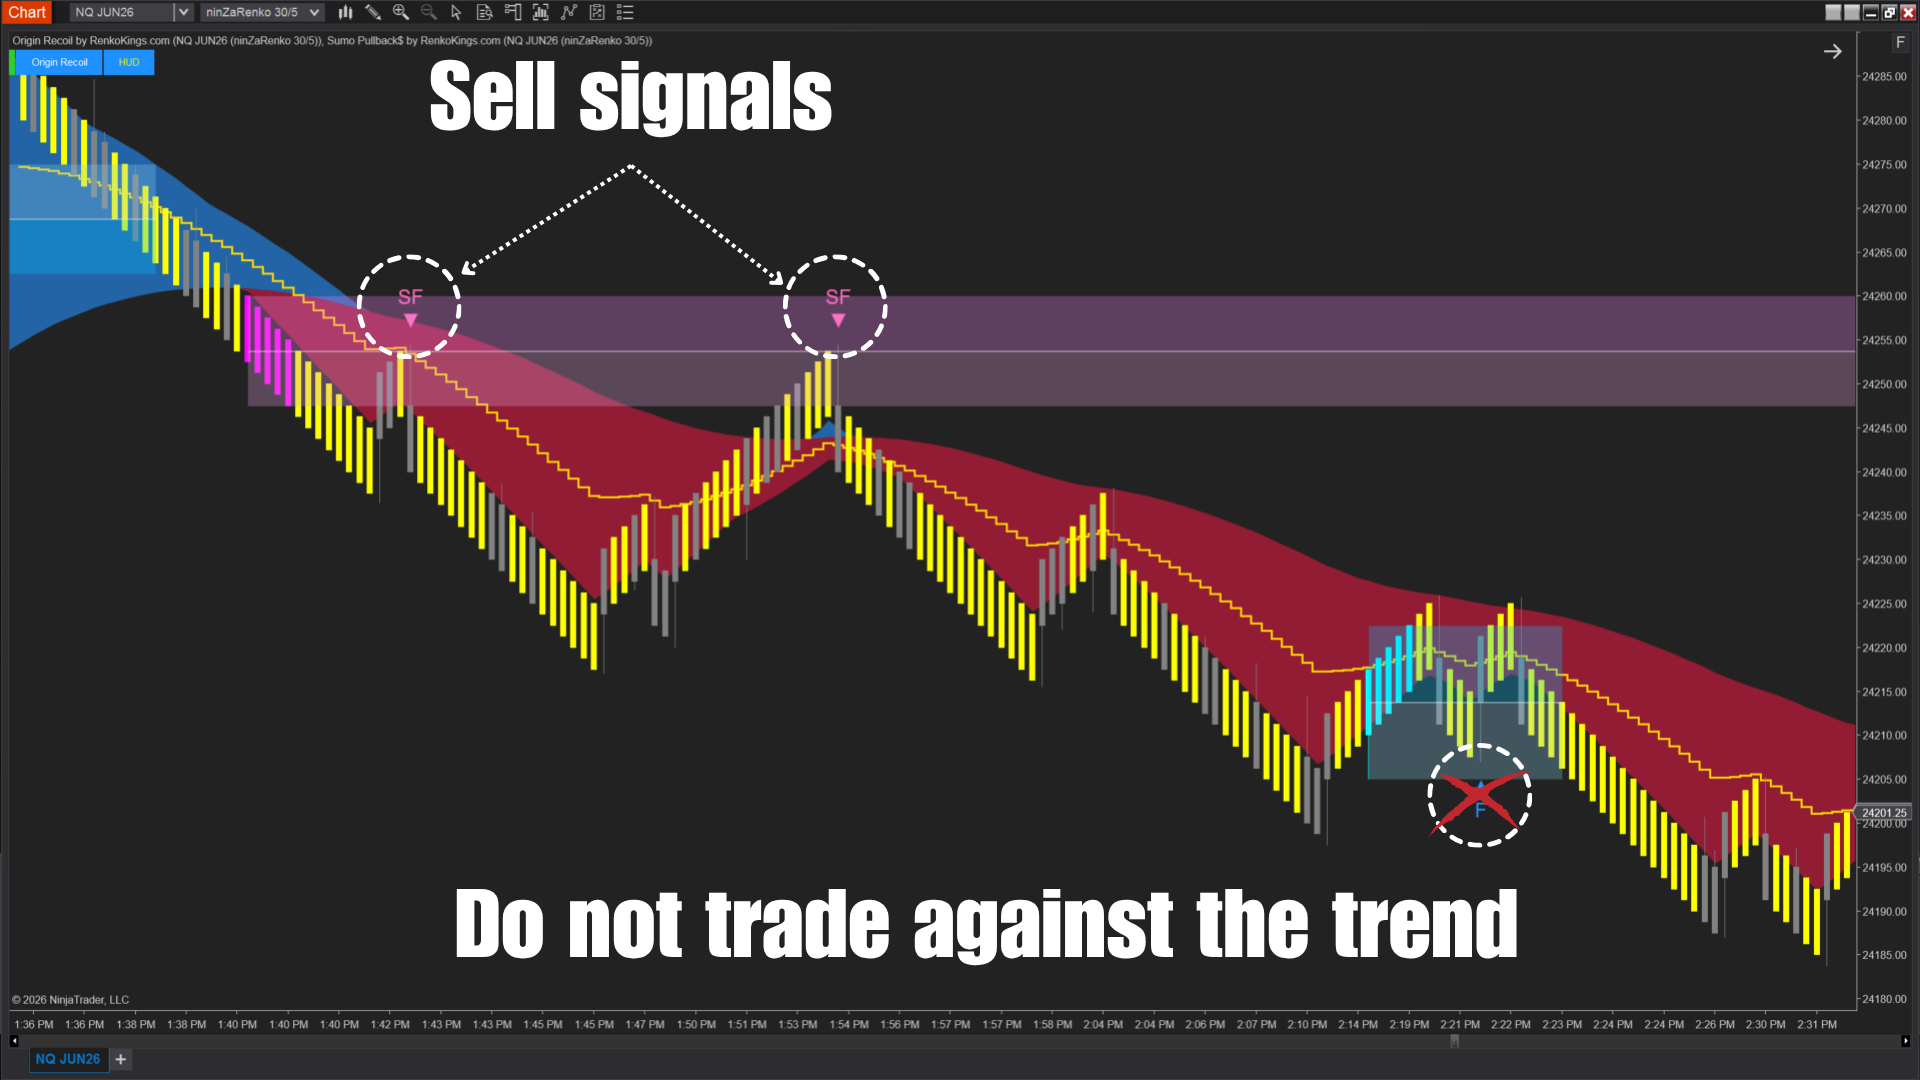
Fast & Superfast signals
Origin Recoil distinguishes between 2 retest conditions:
Fast Signal – Structured pullback opportunity
Often useful in:
- Developing trends
- Markets with deeper pullbacks
- Conditions where better positioning matters
Superfast Signal – Earlier continuation reaction
Often useful in:
- Strong directional trends
- Sustained aggressive momentum
- Conditions with shallow pullbacks
Different retests carry different quality.
That is the point.
What makes this combination different
Many indicators focus only on pullback patterns.
This combination adds 2 additional dimensions:
- Momentum quality
- Speed context on Renko
That can provide a more complete read of price action.
Not just where price reacts.
But why.
Related products
Sale!
![[AbsP] MEO #18: BigTrade Sweep + Highway Fractal Zone](https://renkokings.com/wp-content/uploads/bigtrade-sweep-highway-fractal-zone-hgbhsadasdsdasd.png)
Original price was: $1,292.$400Current price is: $400.
Sale!
![[AbsP] MEO #17: ICT PhantomTrace + LOFI Supply/Demand](https://renkokings.com/wp-content/uploads/ict-loif-1-hdh-500x500.png)
Sale!
![[AbsP] MEO #19: Highway Fractal Zone + Imbalance Volume Sensor](https://renkokings.com/wp-content/uploads/imbalace-fractal-zone-jfjf-500x500.png)
![[AbsP] MEO #8: Origin Recoil + Sumo Pullback$](https://renkokings.com/wp-content/uploads/origin-recoilsumo-pullback-fresdsfsdfsdfsdfsdffgvfdgghbdgdsfg-100x100.png)